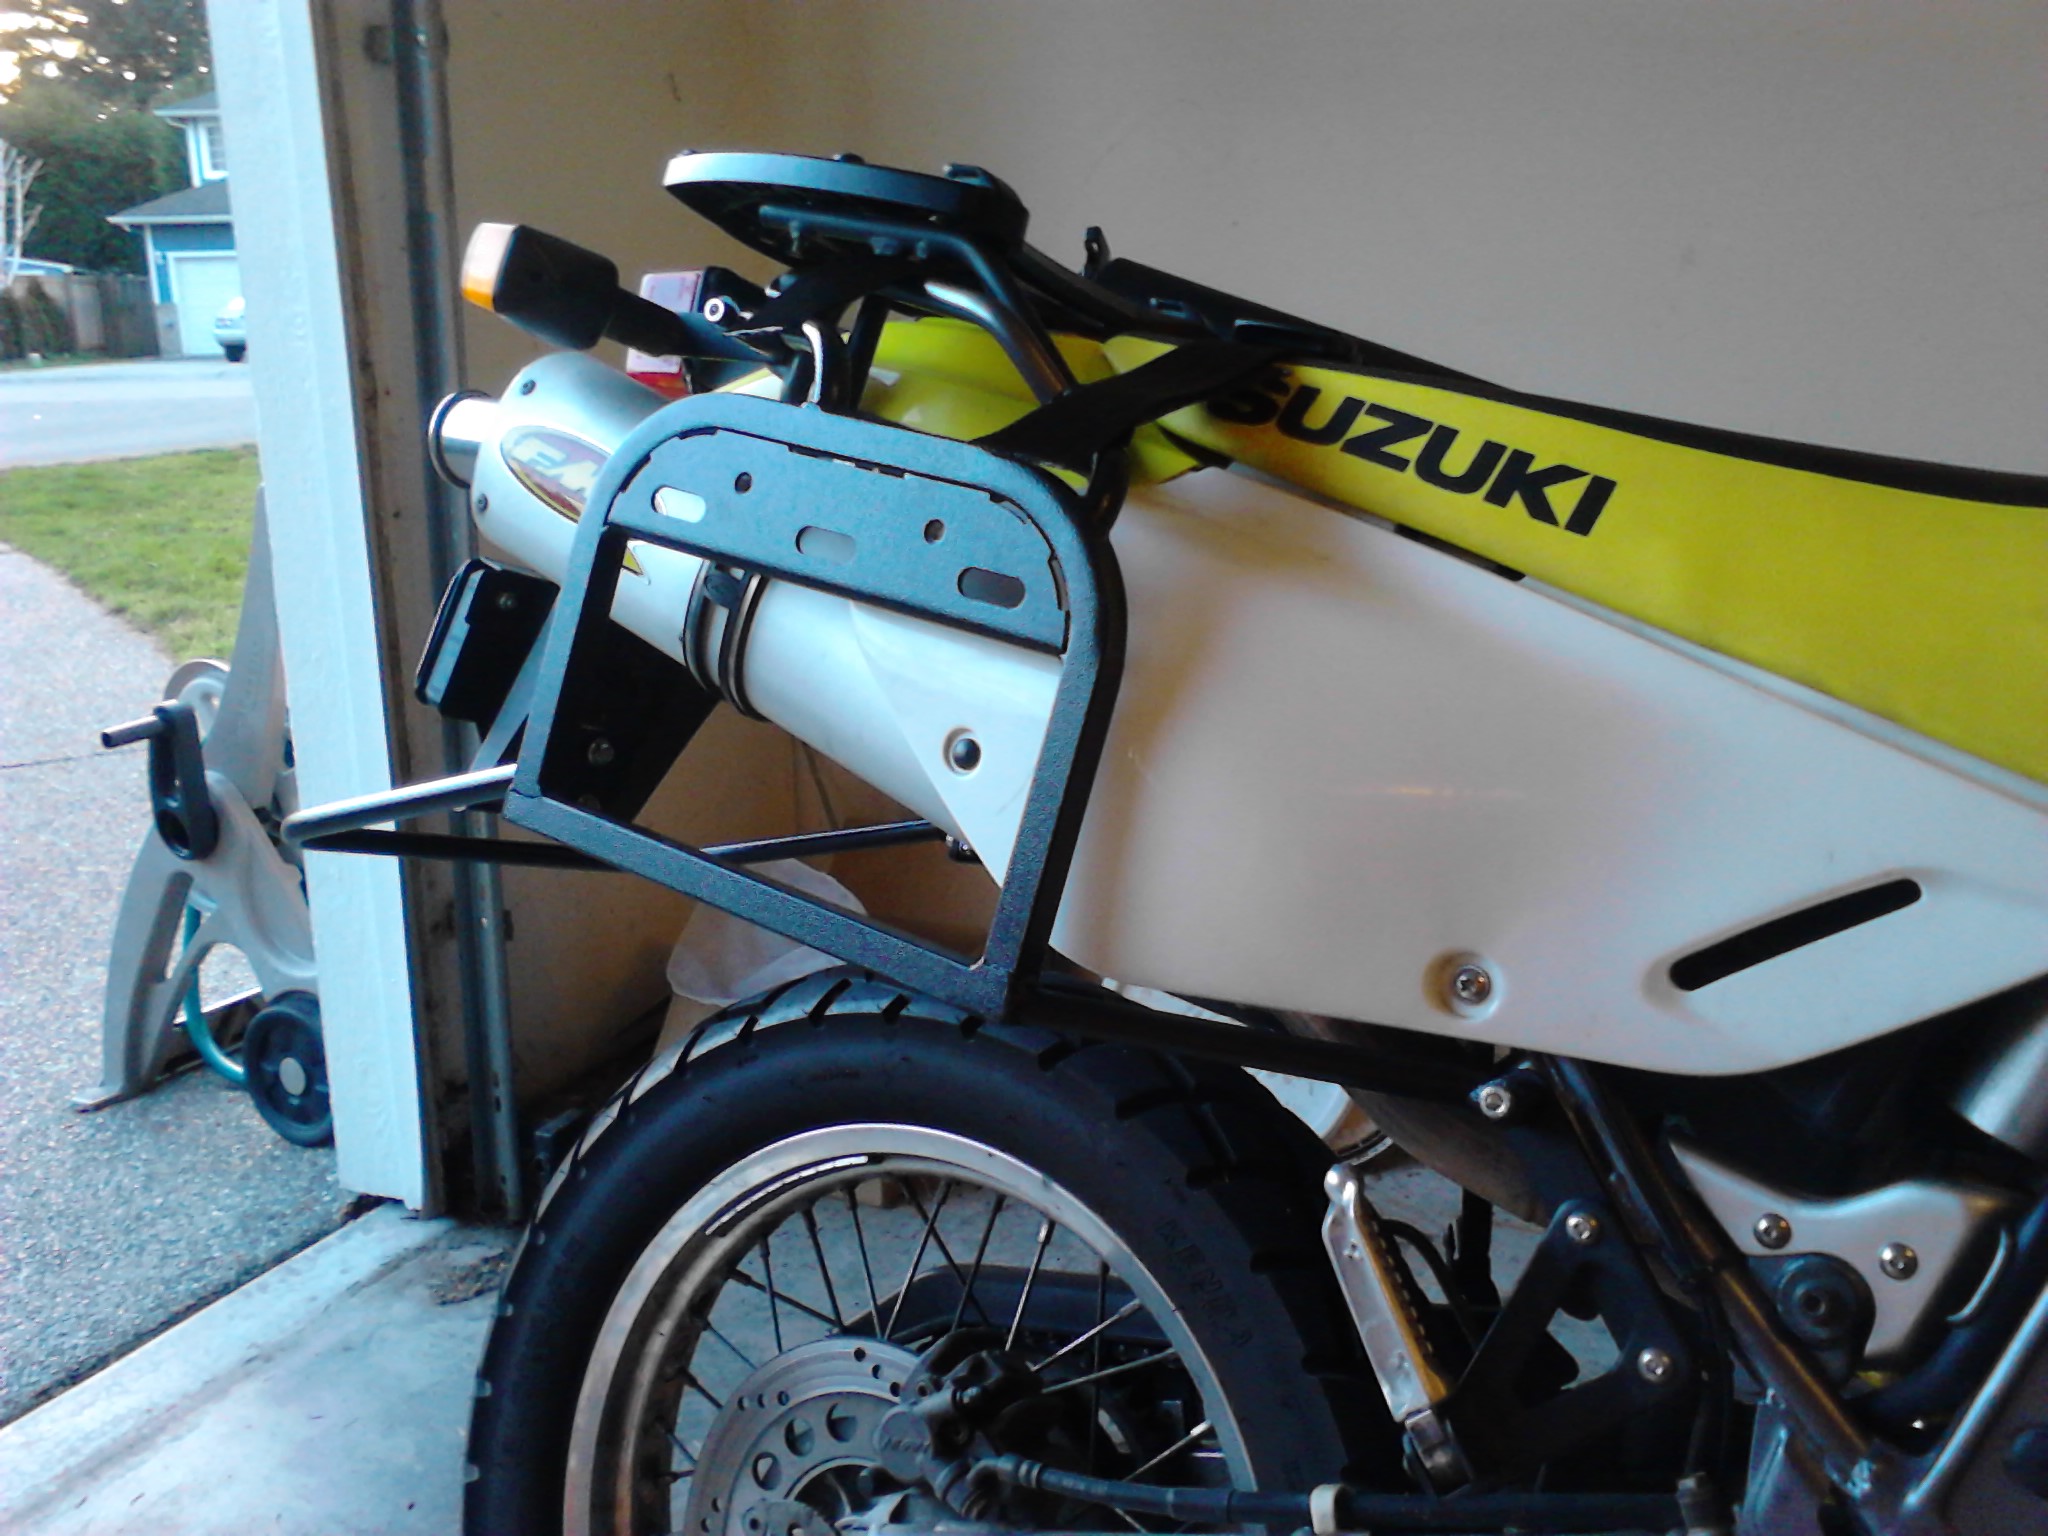
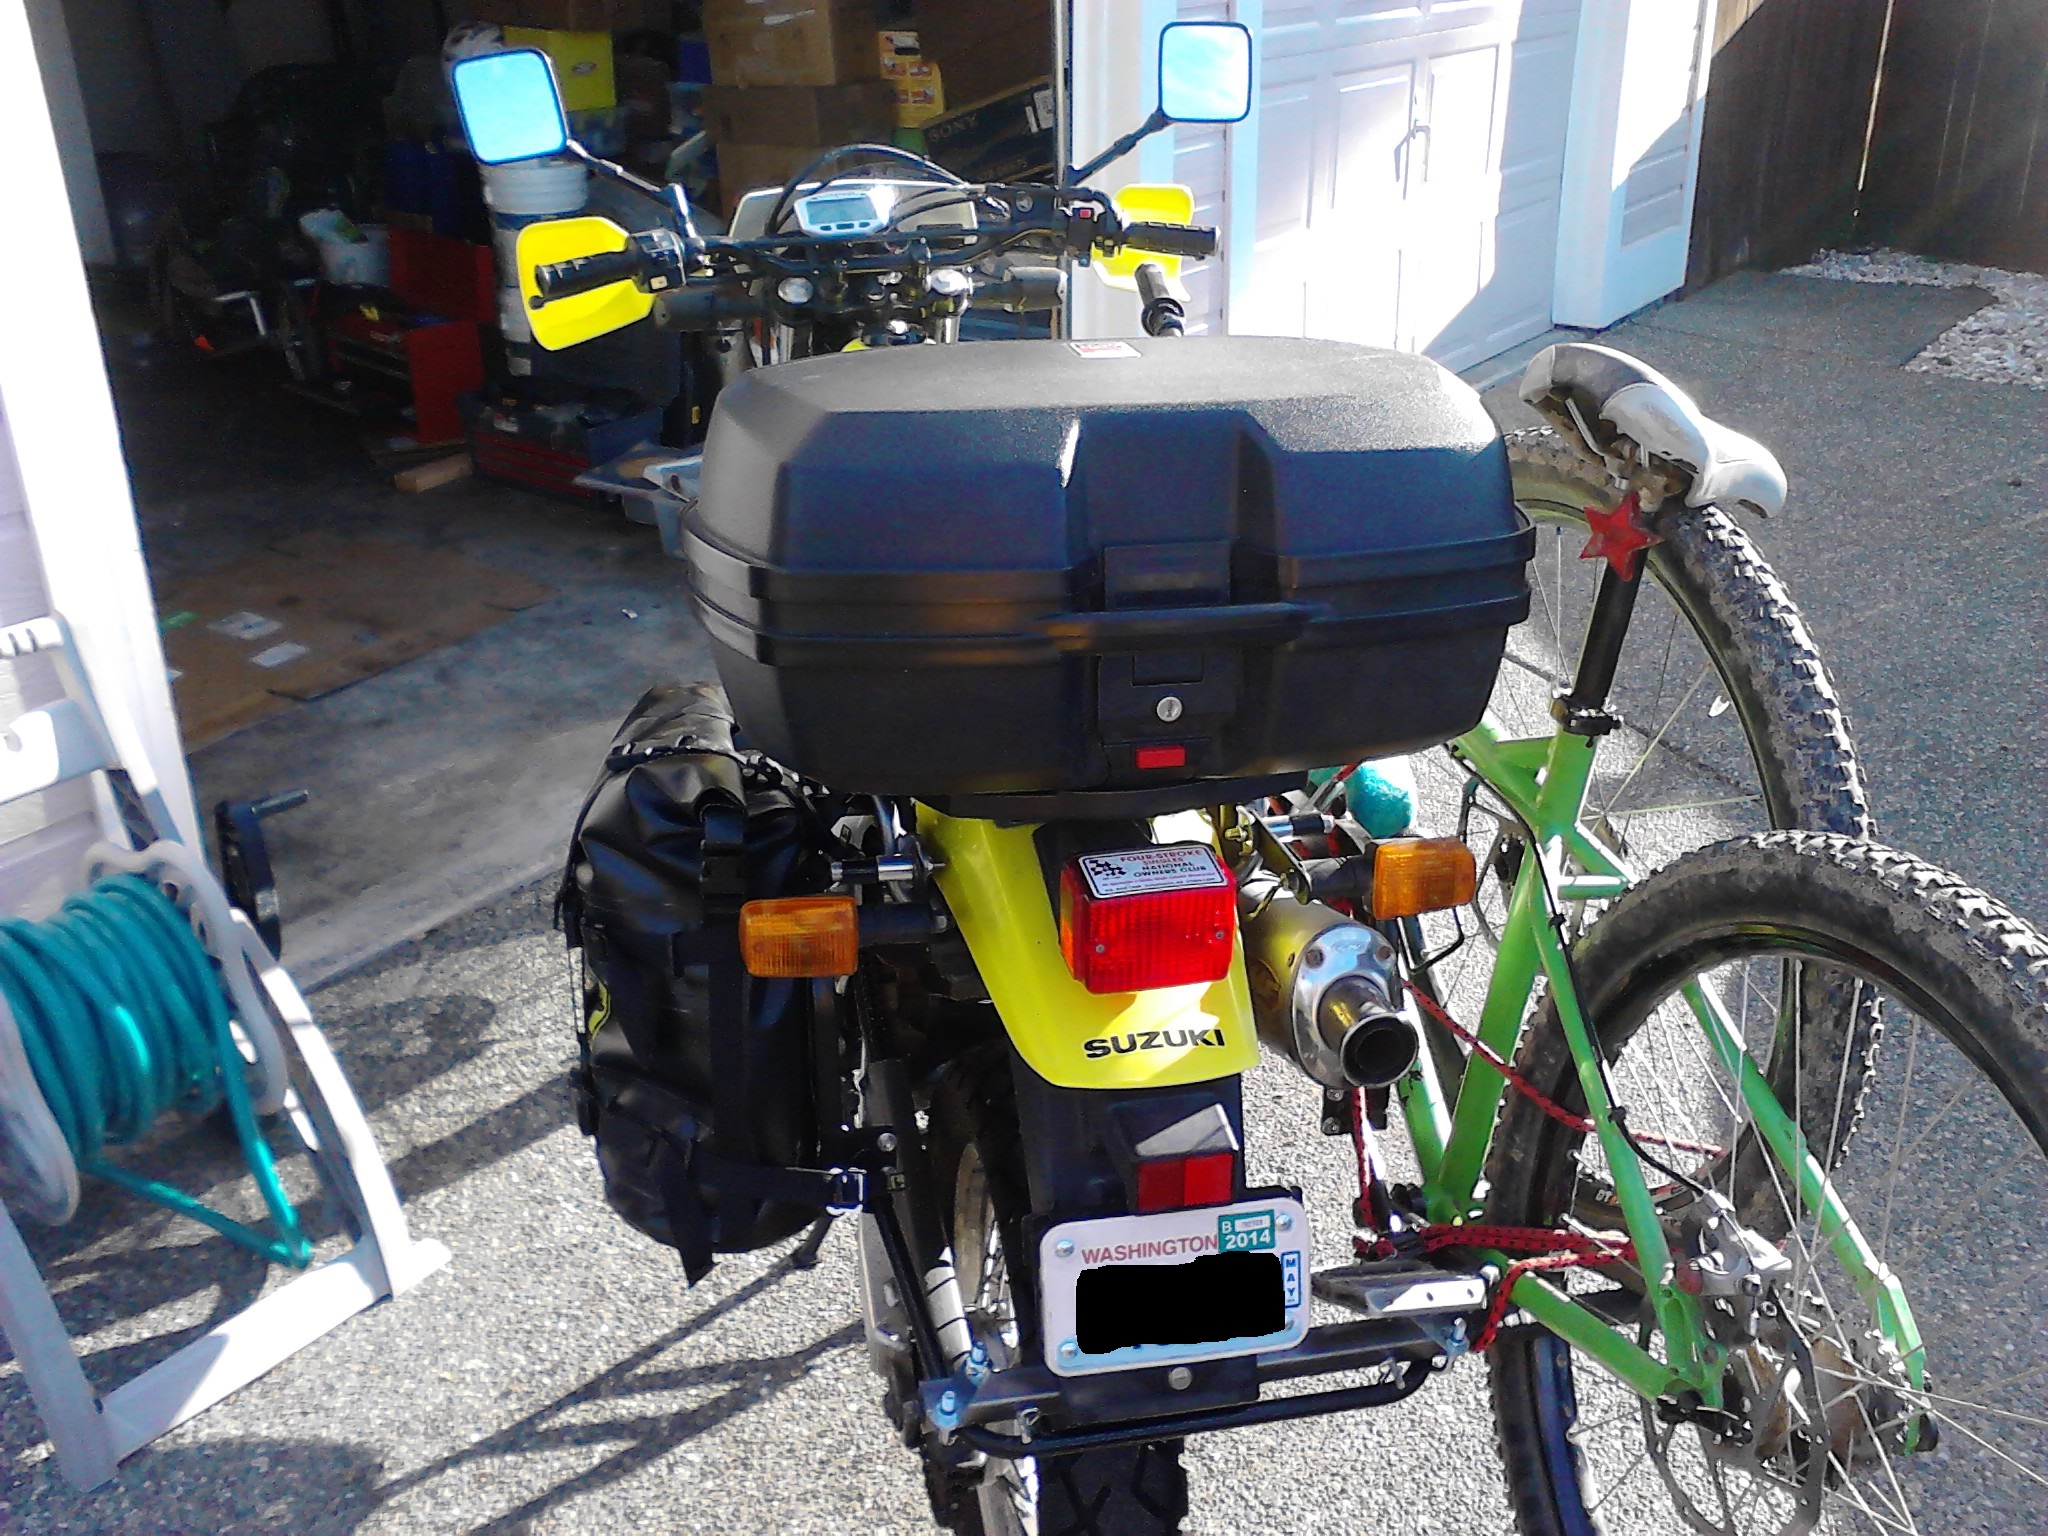
Happy Trail SU Luggage Racks mounted and ready to go.
I made a decision recently that I want to get rid of my car, and use my feet, bicycle, and motorcycle for all of my transportation. Living in Seattle, this is perfectly doable. There are certainly people who are carless year round in far harsher climates that this, using bicycles, motorcycles, or their legs to get around. Plus, parking sucks at the marina where I live, and the hassle and expense of owning a car is starting to outstrip the usefulness.
The one caveat in my case is that I do a fair bit of mountain biking, and the trails are nowhere near where I live (It's always seemed a bit of a fail to me, having to drive your car to ride your bike). The first and obvious solution is to not be a pussy, and just ride my bike to the trails. That is certainly the best solution. However, a lot of the trails I ride at are 25 miles away. It kinda turns mountain biking into an all day epic event. This is totally fine, but I wanted a way to also get in a quick ride after work or something similar. So I decided what was needed was a way to transport my mountain bike using my motorcycle.
I poked around online, and found a commercially made rack system. It could even carry TWO bikes! However, it carried the bikes above and behind the seat, mounting where the luggage rack would go. I use a Givi top box in that location, which I would need to carry my biking gear. Plus, the idea of a bike sticking way up and back seemed odd to me. In case such a rack interests you, the one I am talking about is the 2x2 Cycles rack. I wanted to carry a single bike, sort of along side the motorcycle. There used to be a rack system called the Cycle By Cycle, but it didn't seem to be made anymore. So, I decided to roll my own.
The first step was to install a pannier/luggage rack. This would serve as a stable mounting point for the bike rack, as well as allow me to mount either hard or soft panniers. I chose the Happy Trail SU racks for my bike (Suzuki DR-650), as they seemed quite sturdy. Through the magic of the internet and UPS, the arrived a few days later, and I mounted them up without much hassle.
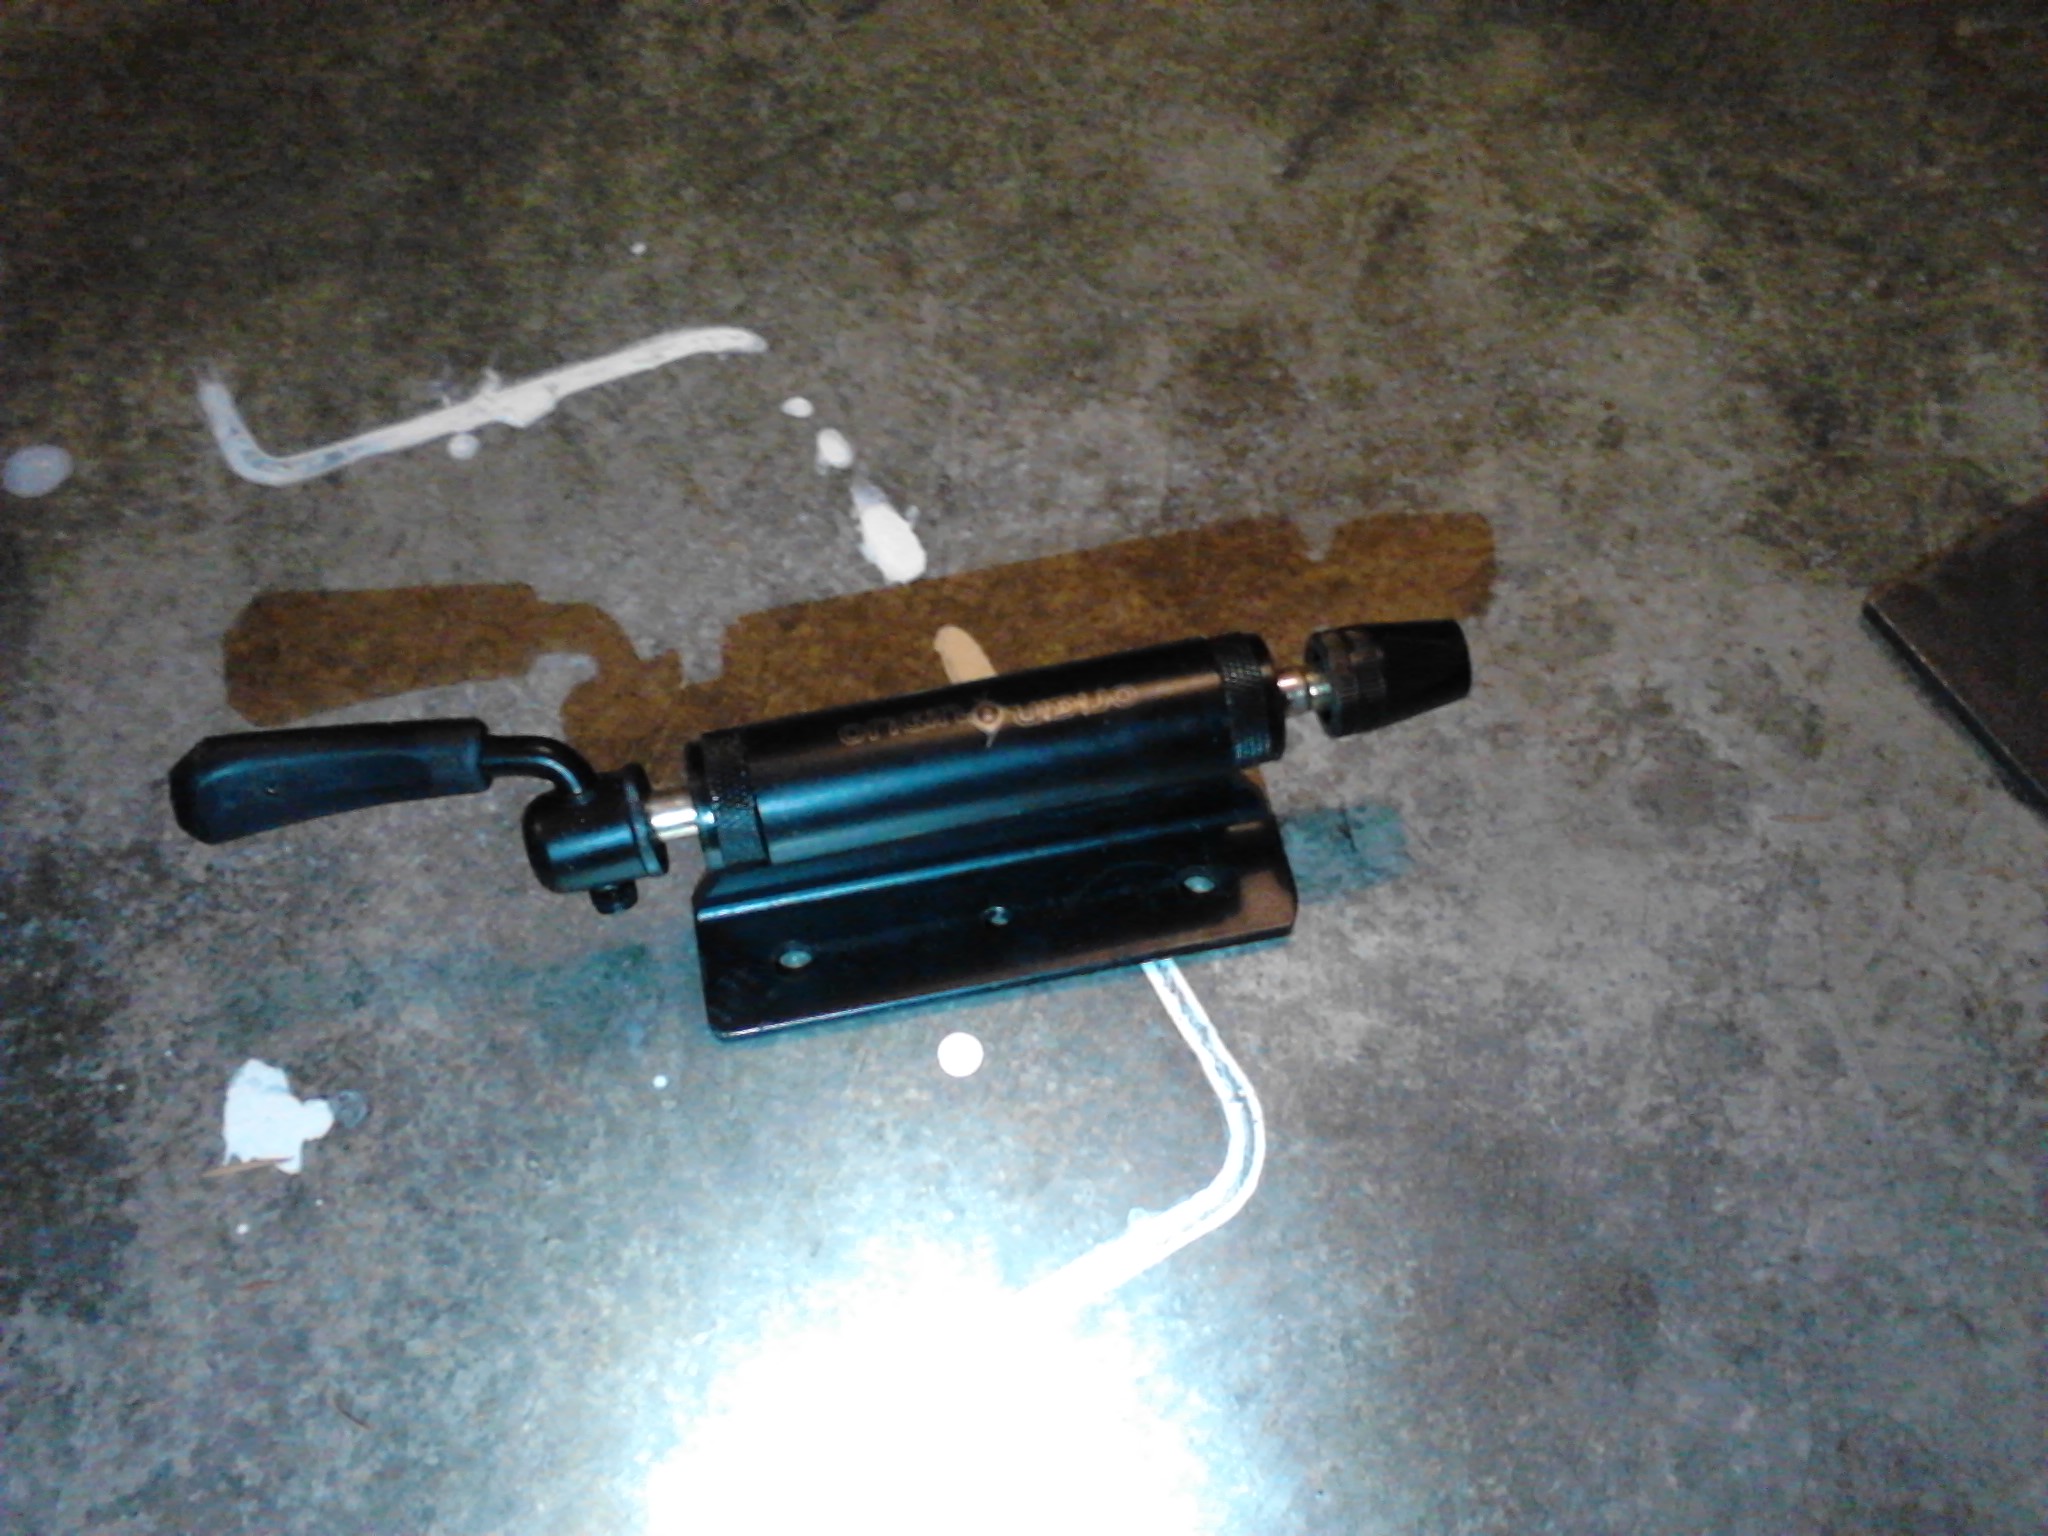
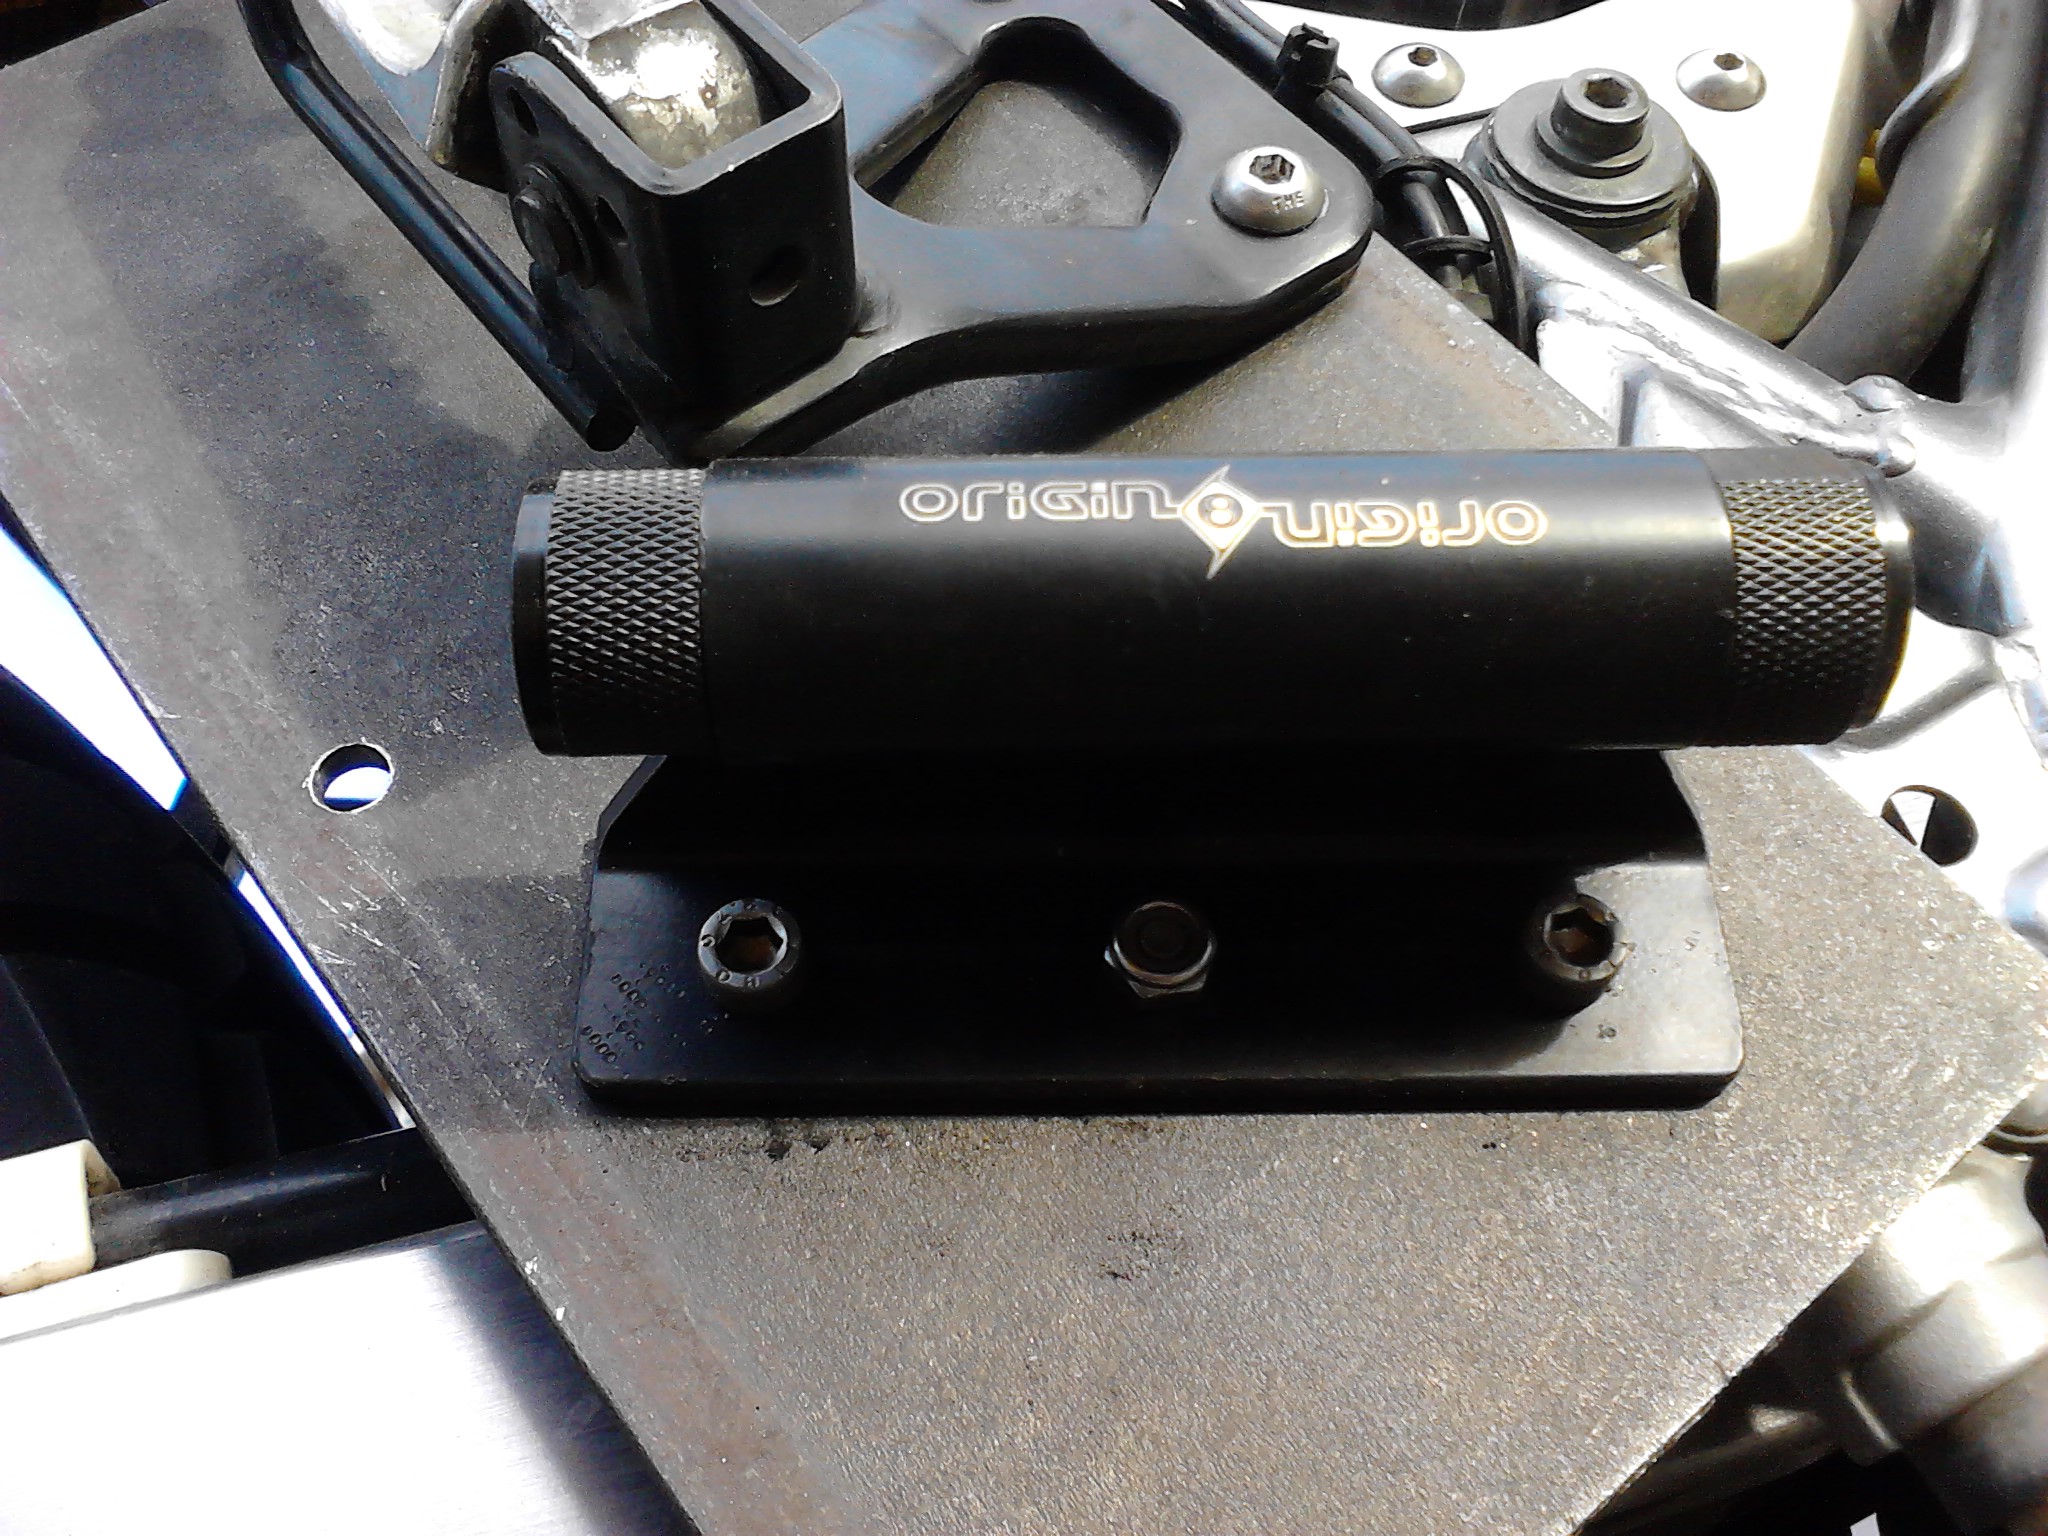
My basic plan was to attach a bar across the back of the rack so that it stuck out the side of the bike. This would support the rear of the bike in some fashion. The front would be supported by a fork mount, similar to the way a lot of roof racks work. Unfortunately most fork mount racks are made for a standard 9mm QR9 type of wheel. My bike has a 20mm thru axle. They make adapters called a "Fork Up" that mount to your fork/axle, and then go into the 9mm axle of the rack, but this seemed overly complicated. After a bit of searching in the interwebs, I found the Origin 8 Bike Block. This is made to bolt to a wall, pickup truck bed, etc and accepts all 3 common axle sizes: QR9, 15, and 20. I ordered that, and soon it arrived.
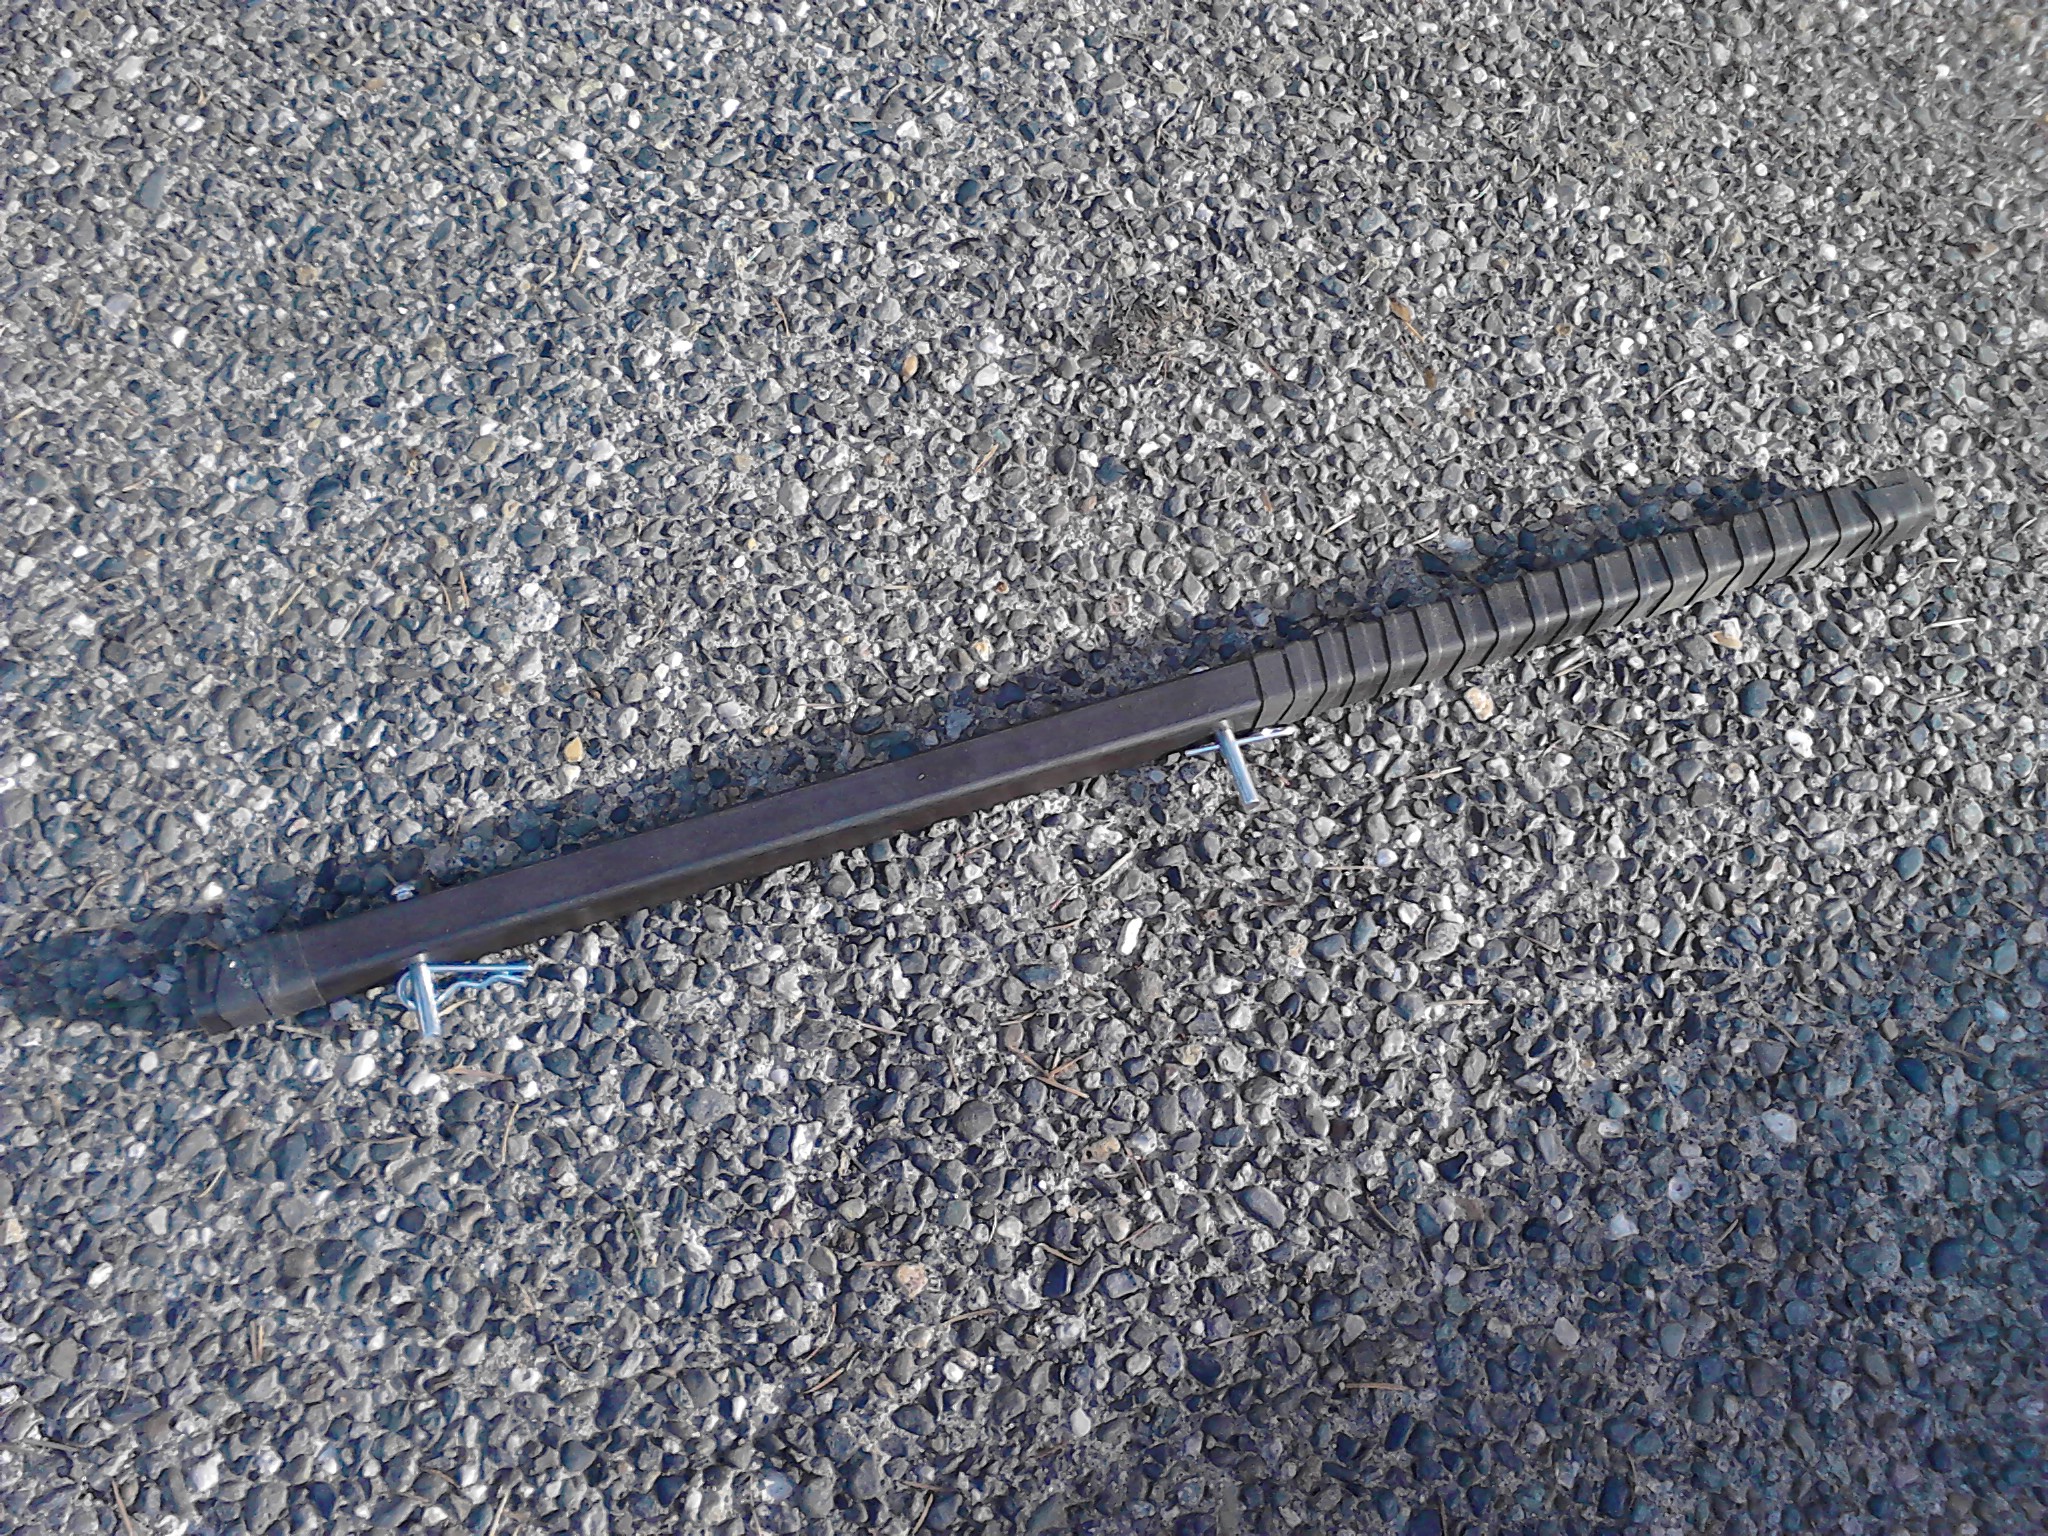
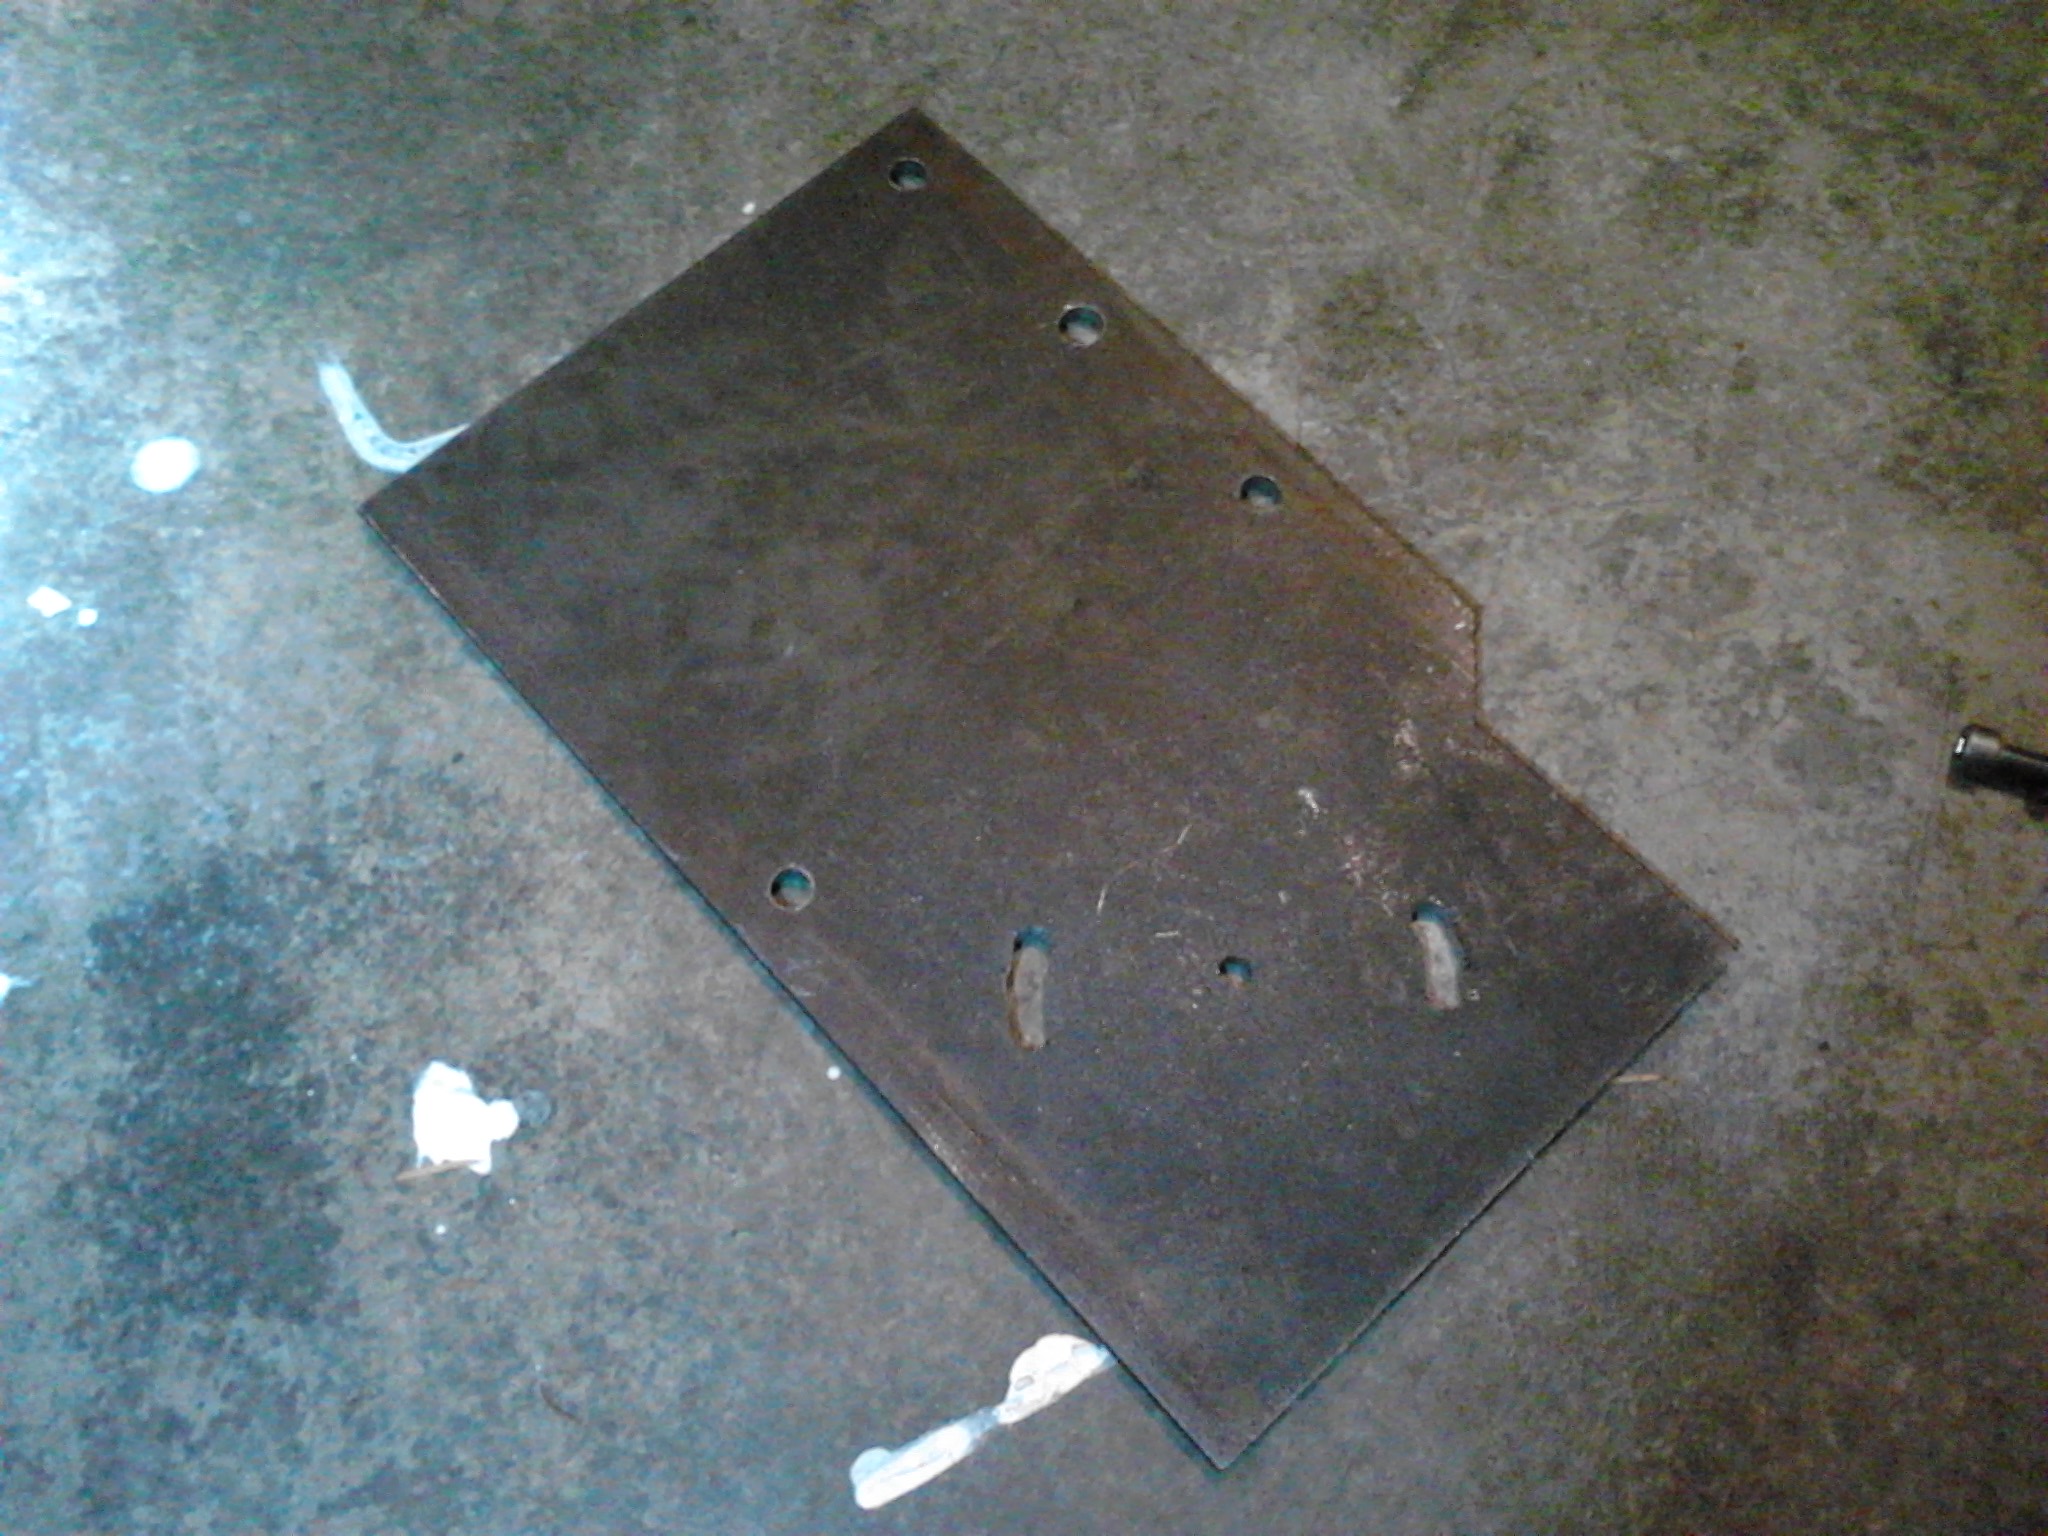
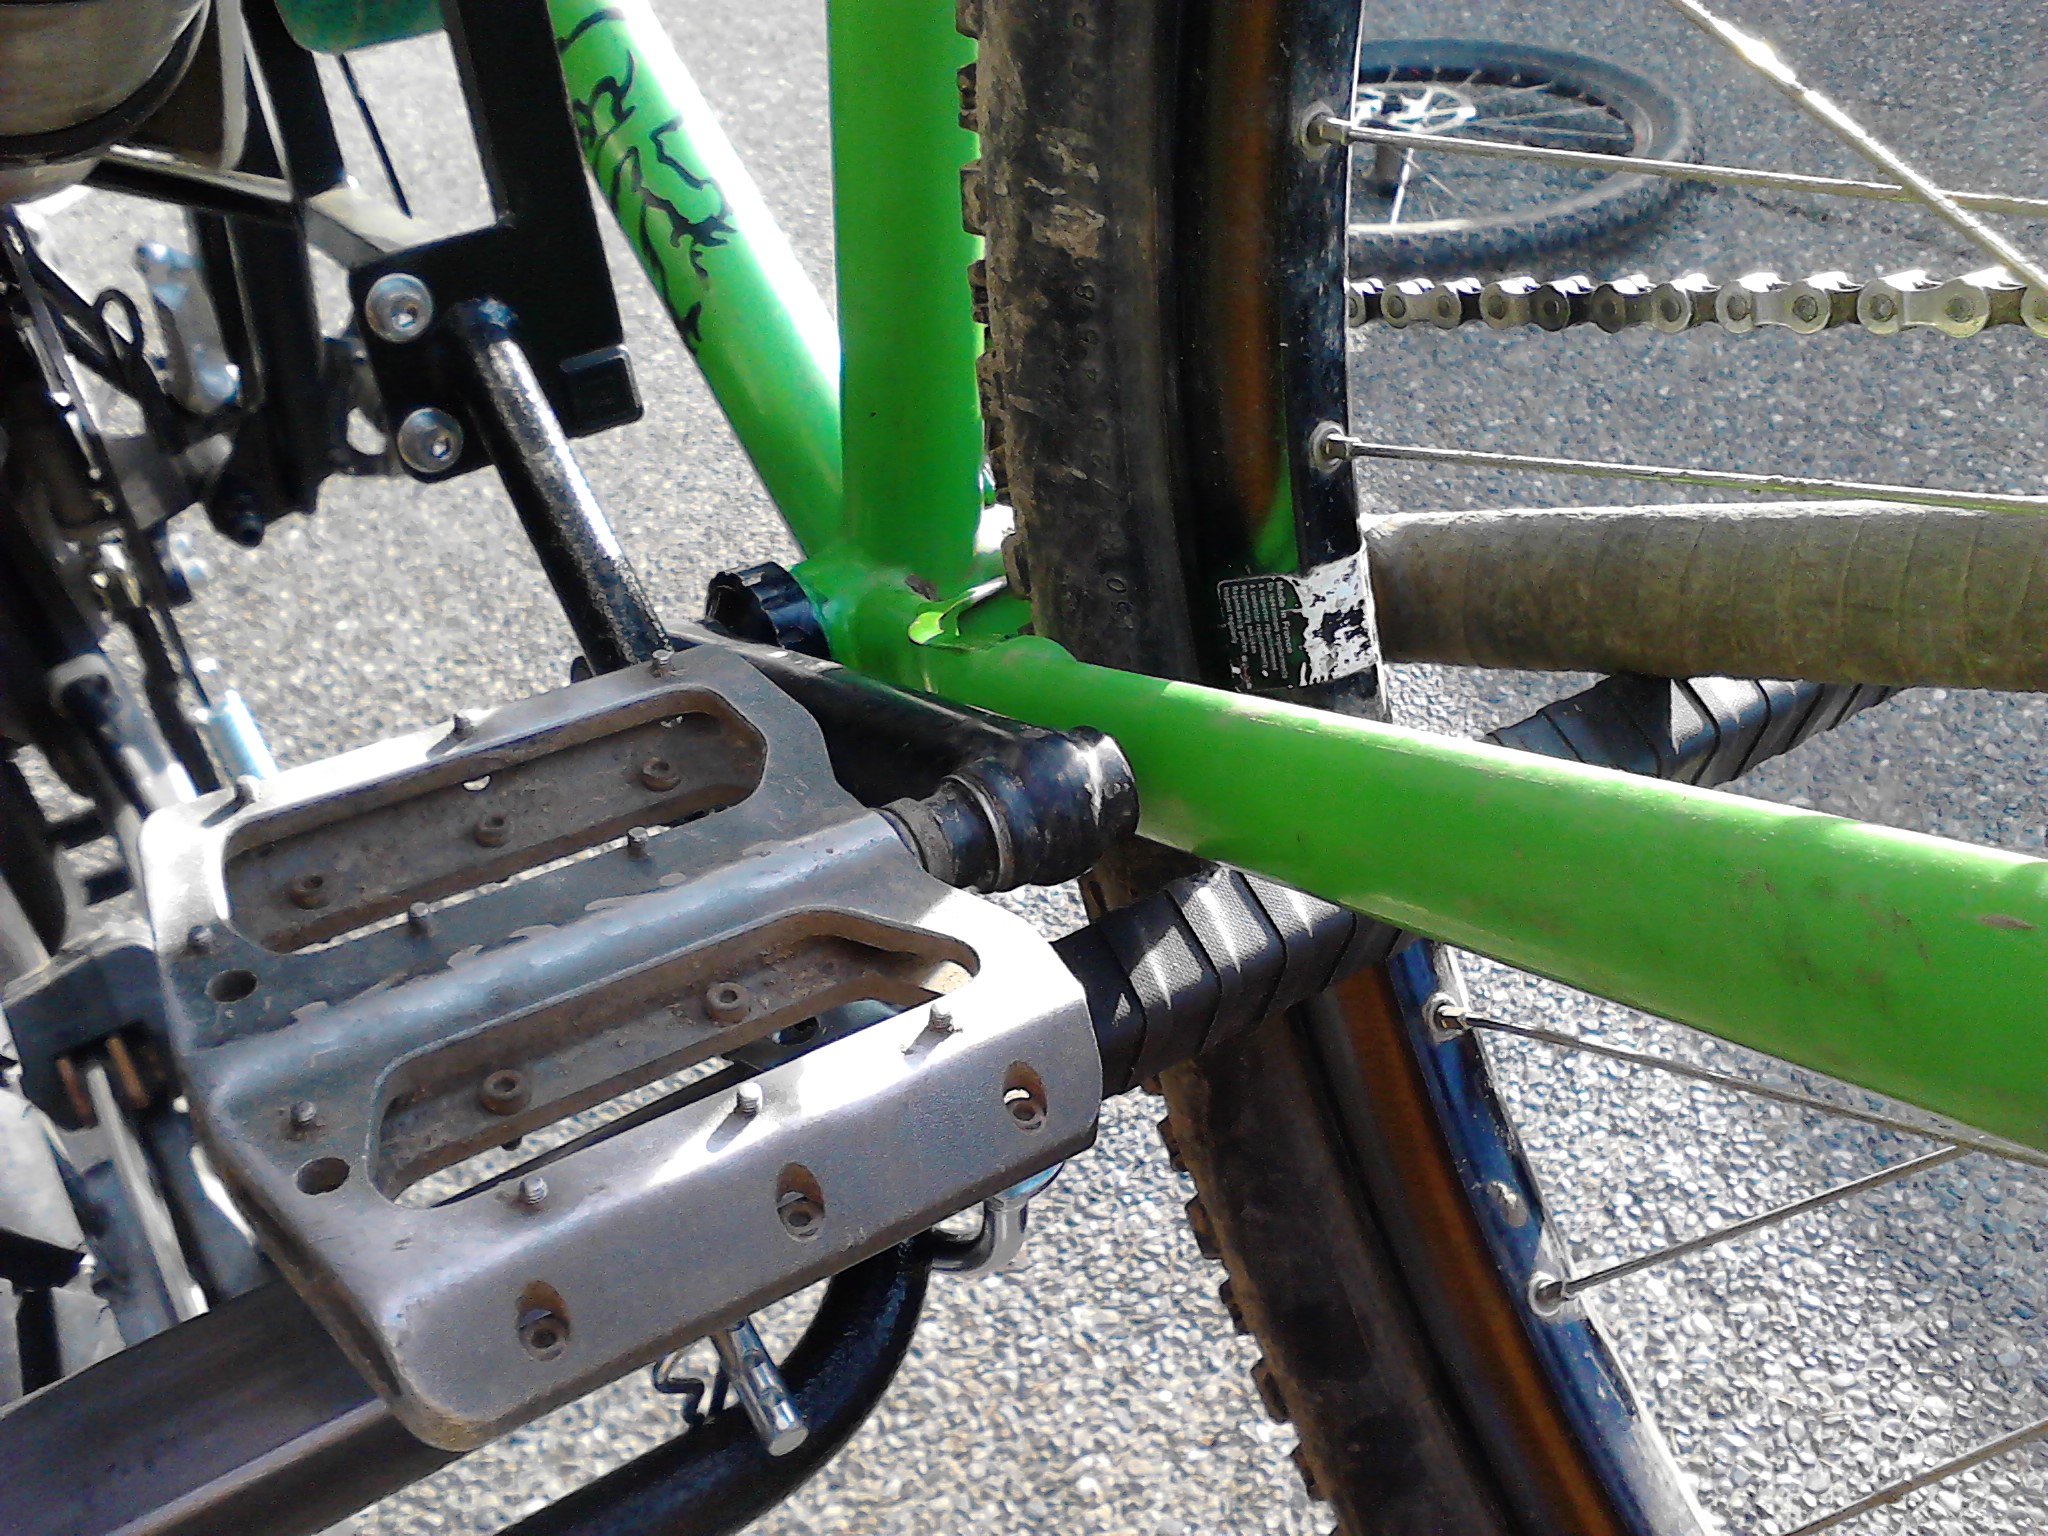
With this critical part sourced, I needed something for the load bar, and also some way to attach the fork mount to the bike. I drove down to the steel supply place, and $10 later I had a 3/16" thick steel plate, and a couple pieces of square tubing, one of which fit inside the other. The plan for the load bar was to have the outer piece stay on the bike, and have the inner piece easily removable for when the rack was not in use. I got some U-bolts from the hardware store, and set to work with my hacksaw. A couple of clevis pins to hold the inner bar in it's mount, and some self vulcanizing rubber tape to wrap the end to protect the bike frame, and voila, the load bar is ready. Also, since the two pieces were a loose fit, the rubber tape was used to pad out the size of the inner piece so it fit more snugly and prevented metal on metal rattling.
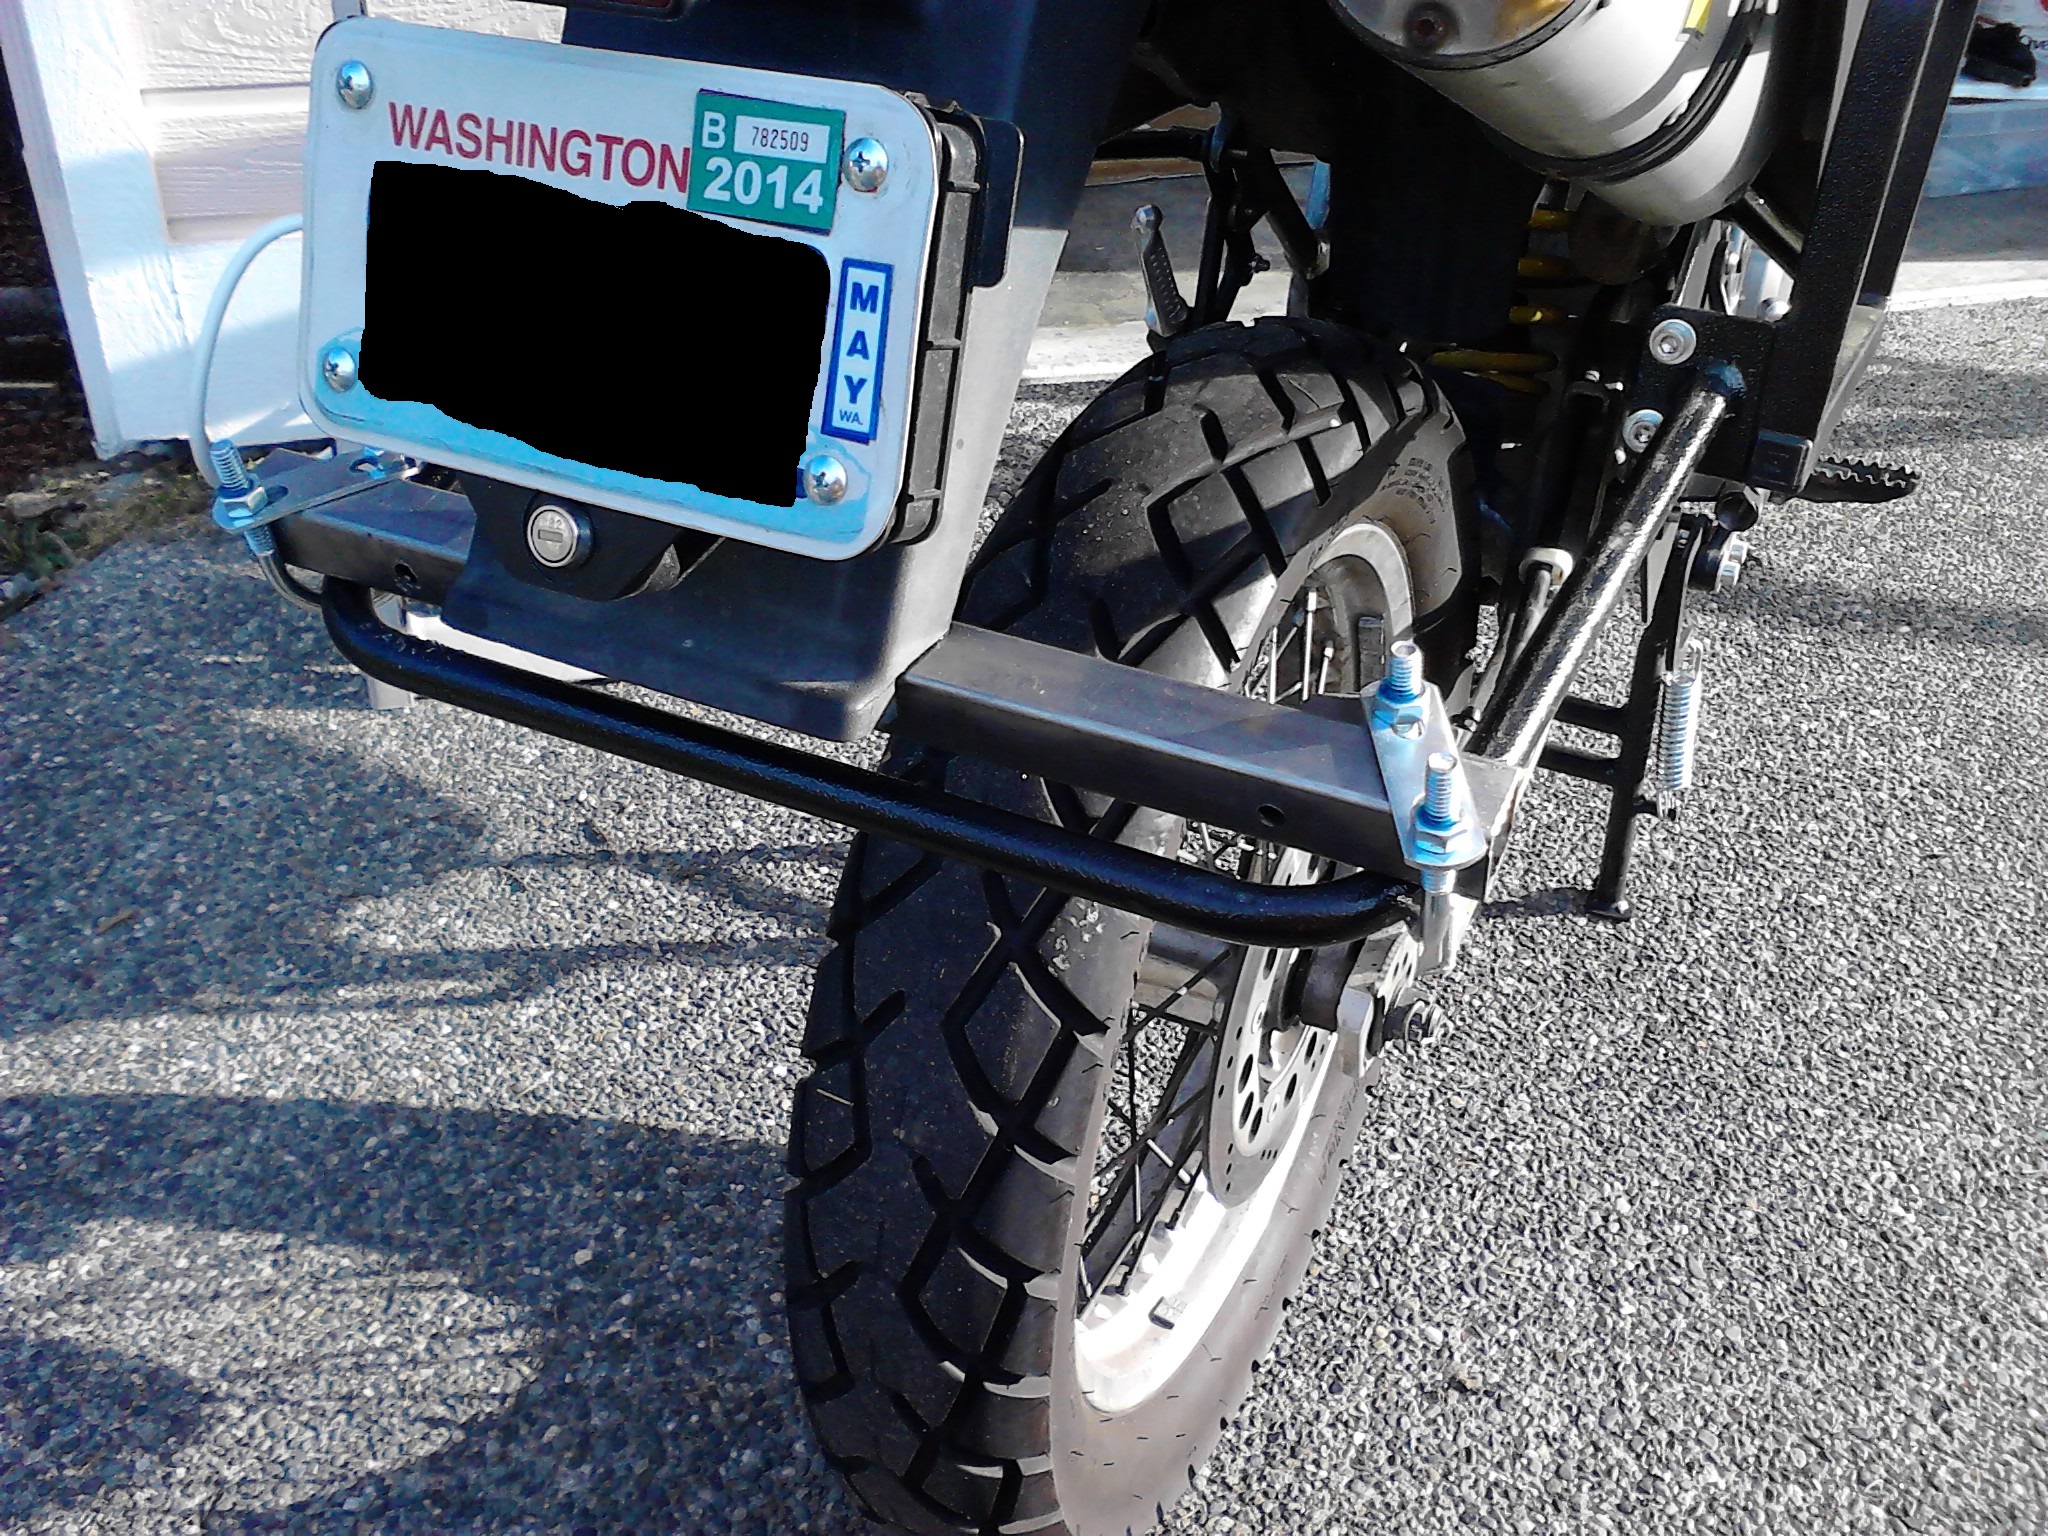
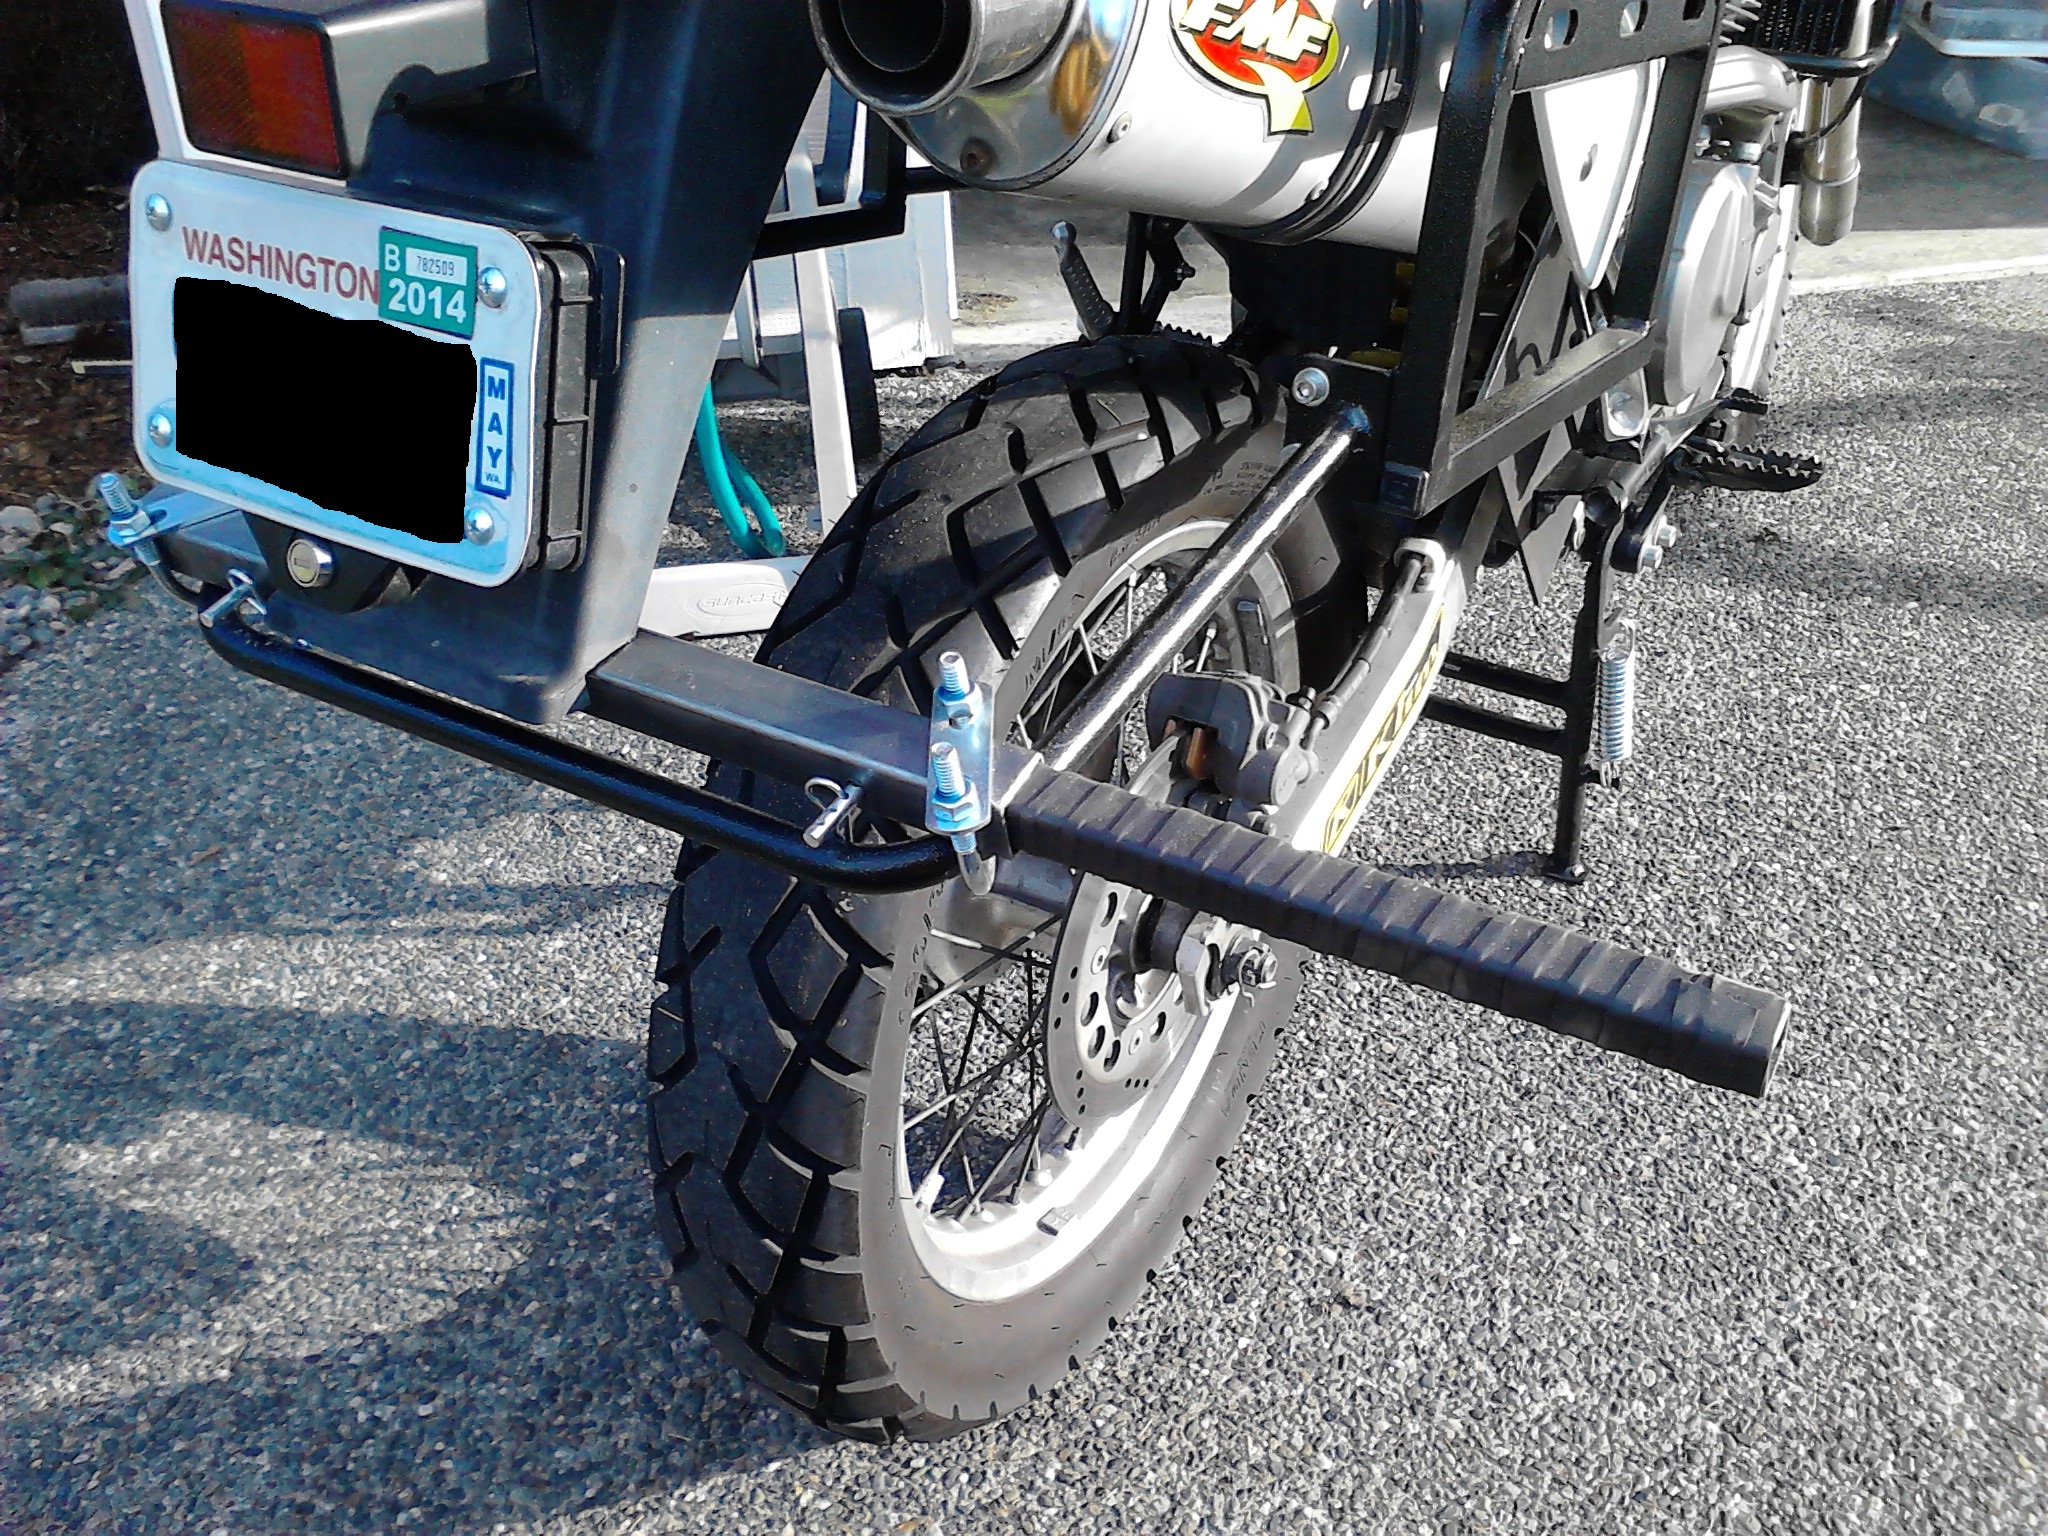
The next step was the mounting plate for the fork mount. I decided this would take the place of the existing metal strap that attached the passenger peg mount to the motorcycle frame and the side rack. After a bunch of measuring and aligning and checking, I cut off a small amount so that it would clear the rear brake master cylinder mount. Making this 2 or 3 inch long cut was a bit of a workout give that my hacksaw blade is probably older than I am! Them some more measuring and aligning, I drilled 3 mounting holes to attach the plate to the frame, and attach the peg mount to the plate. In case you are trying to duplicate this at home, the top bolt goes through the Happy Trail rack, through the plate, and into the threaded hole in the frame. The next bolt down goes through the peg mount, through the plate, and into the threaded hole in the frame (These are the original 2 threaded holes that mount the footpeg. The HT rack uses a metal strap to lower the peg by one hole.) The last bolt goes through the peg mount and through the plate and fastens with a nylock nut on the back (Just as it did with the HT peg relocation plate/strap).
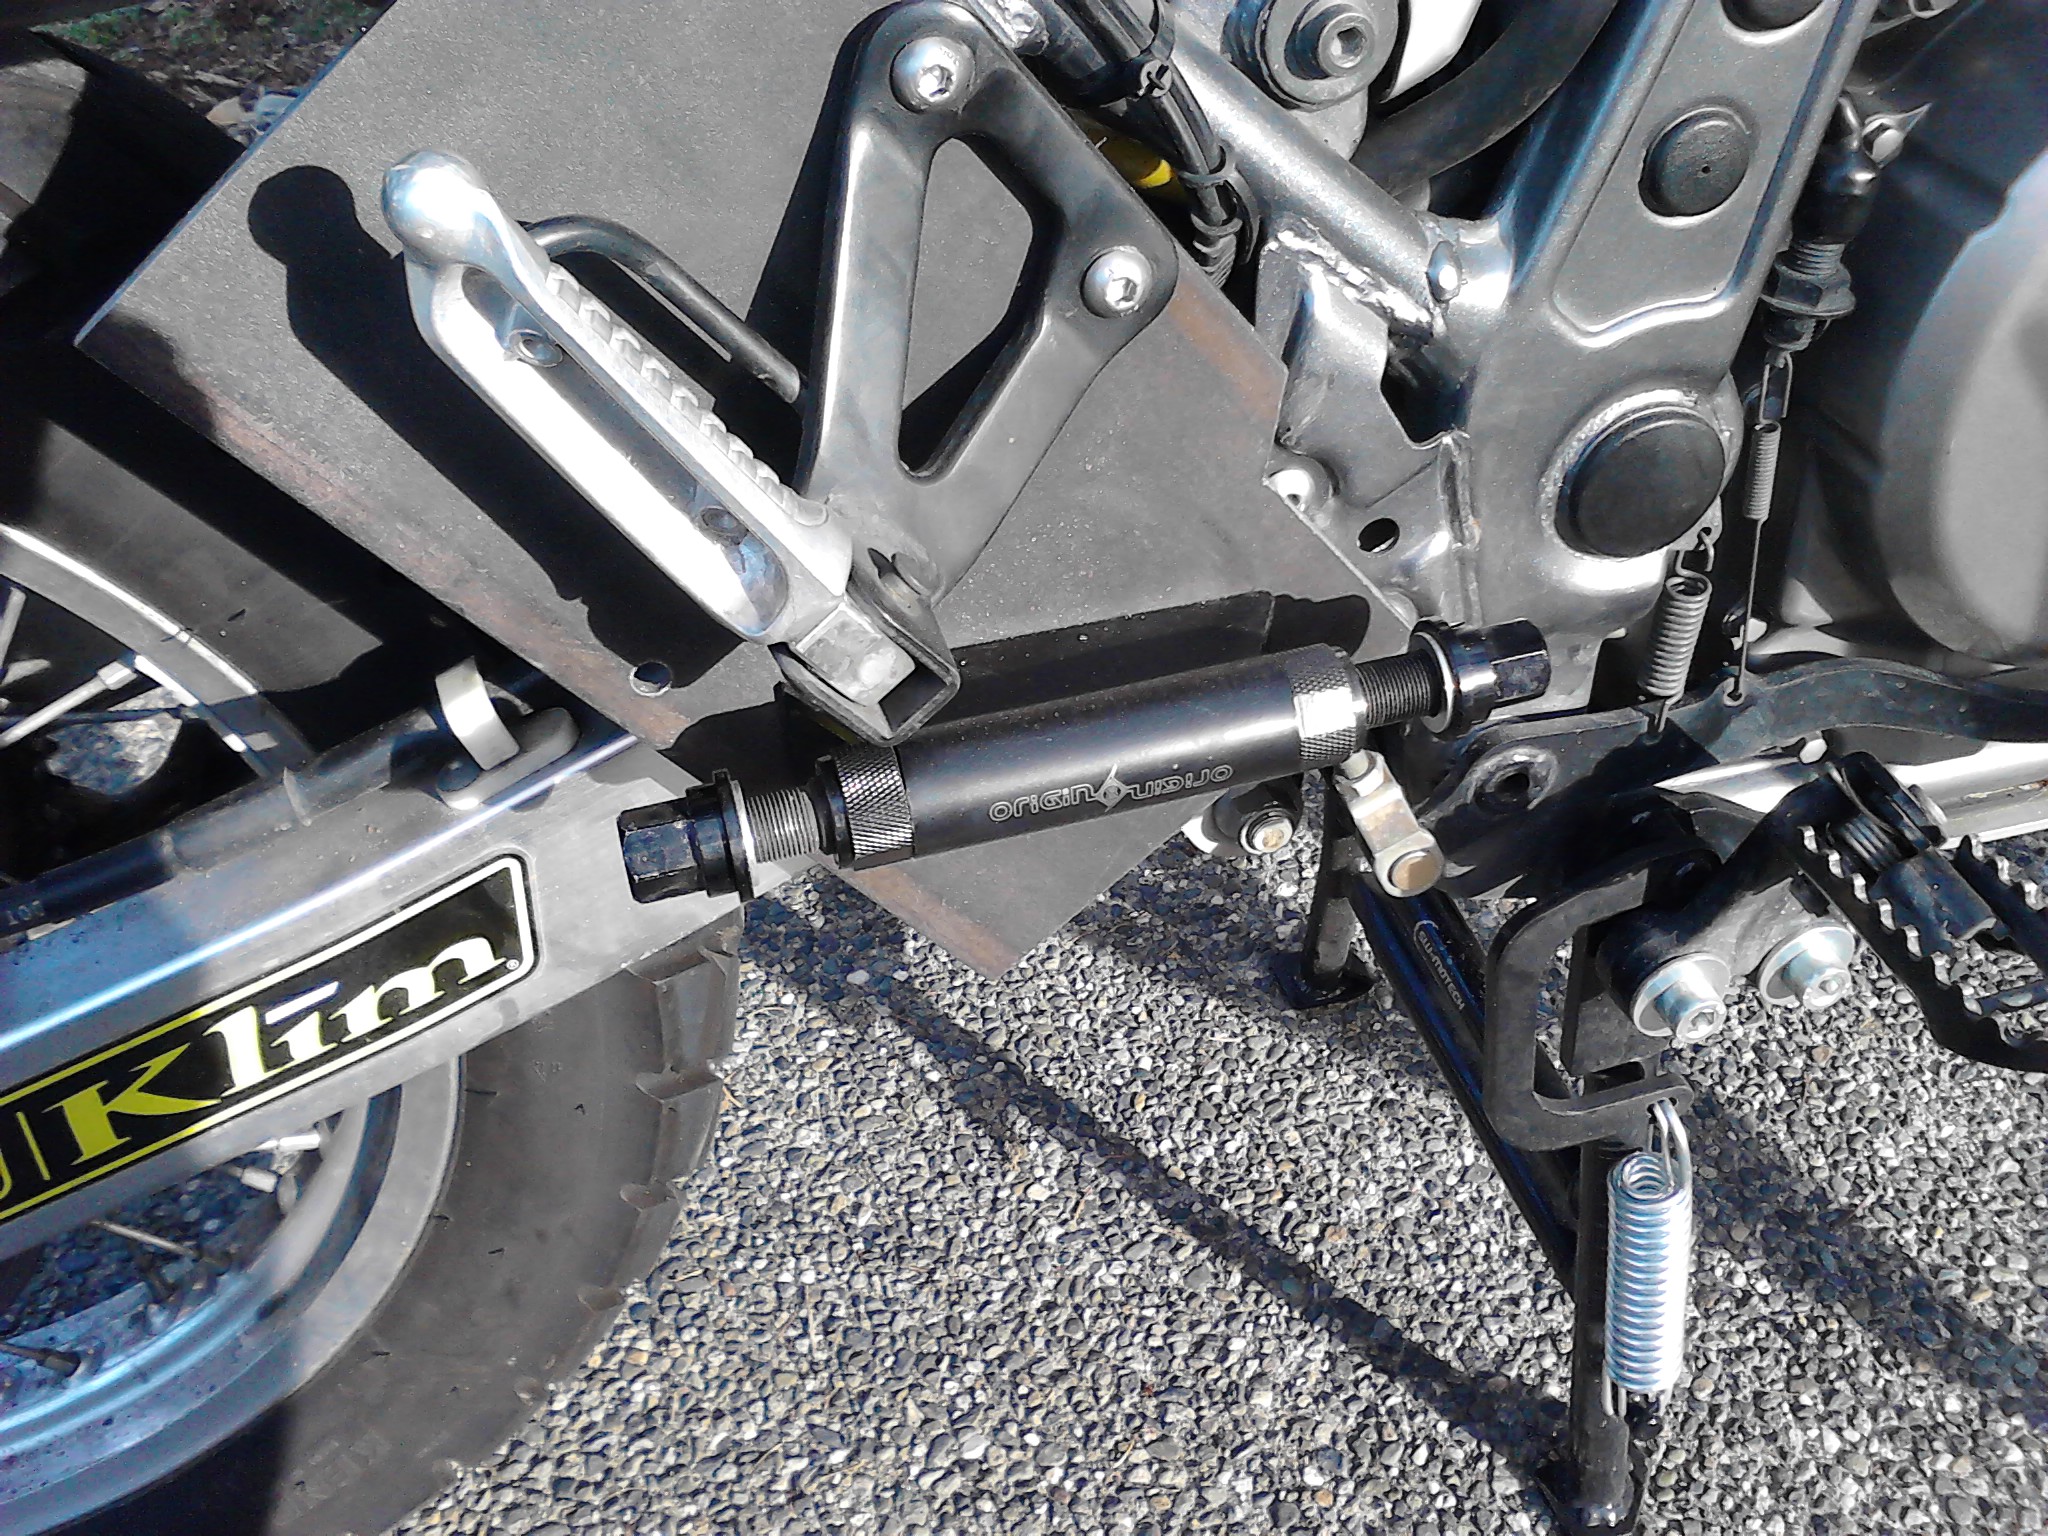
Now, with the plate installed, and the bike placed on the load bar, the fork mount was carefully positioned on the plate, clamped, and tested for rider clearance. Then the location was marked, and 3 holes were drilled in the plate to match the 3 holes in the fork mount. The center hole in the fork mount is threaded (metric), so I inserted the bolt through from the back of the plate, and tightened it until the mount could pivot, but with very little play. Then a nylock nut was tightened down on the front side against the fork mount to act as a lock nut. This prevents the not-quite-tight bolt from backing out or tightening up, allowing the fork mount to pivot on that bolt. For the two holes on the ends, the mount was rotated a few degrees in either direction, and additional holes were drilled. I then connected these holes by filing and grinding to make an arc shaped slot on each end. This way the fork mount could be adjusted for angle, then the bolts tightened to lock it in place, allowing it to work on other bikes.
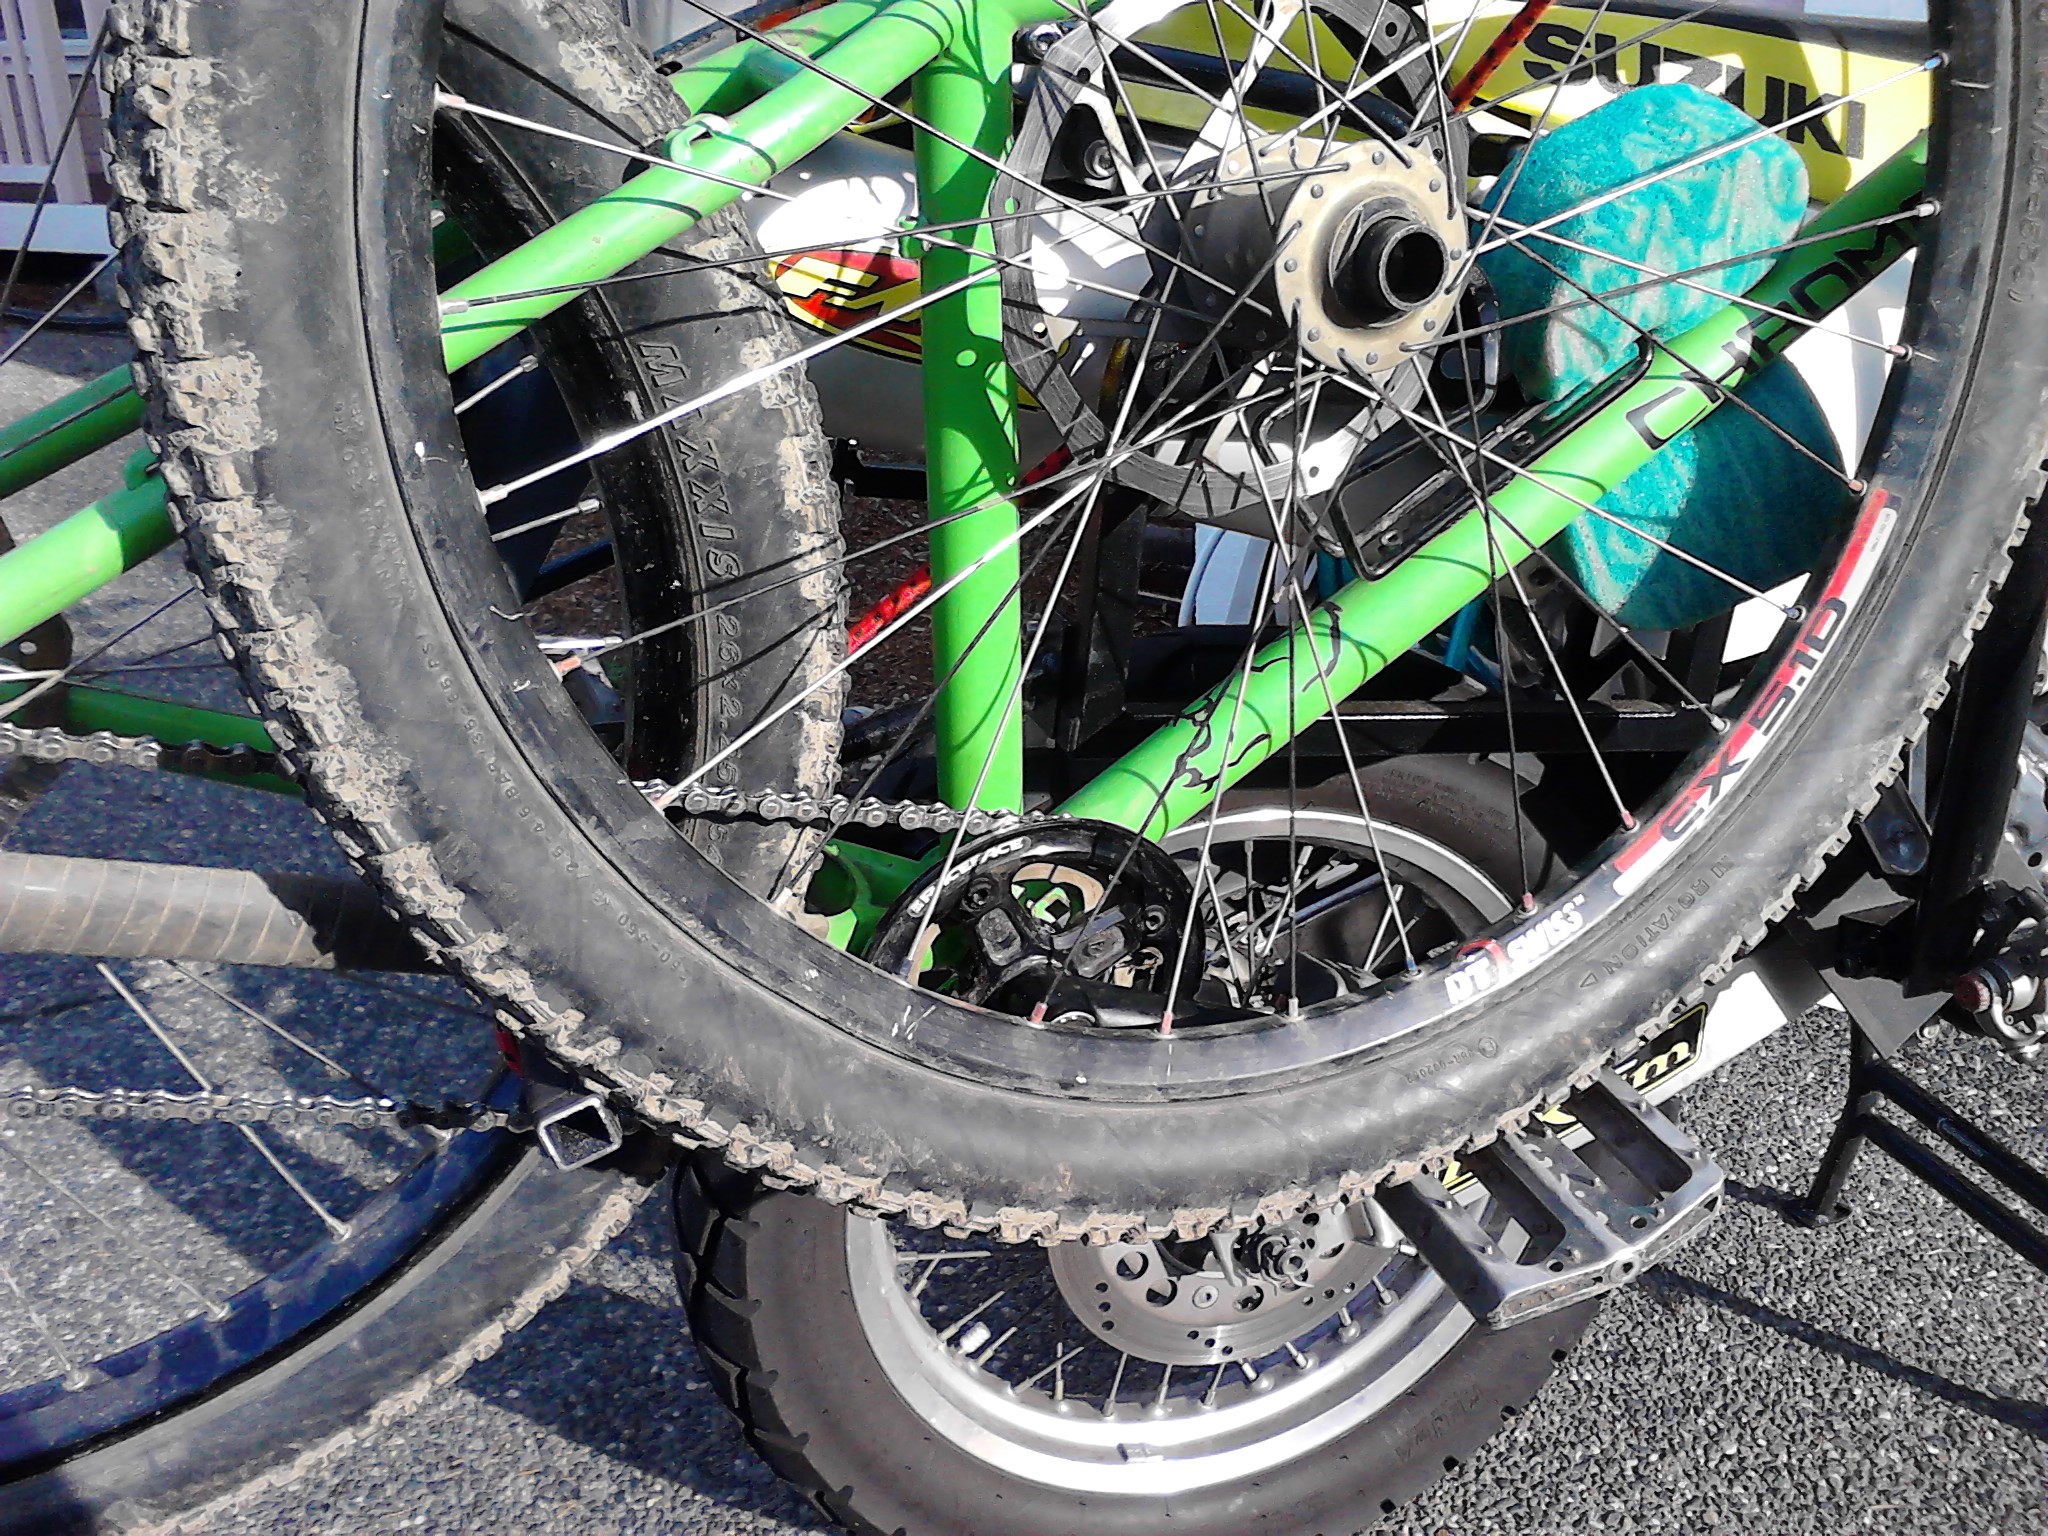
With the plate attached to the bike, the fork mount was left loose, and the fork bolted to it's mount with the axle. Then, the rear of the bike was placed on the load bar, and the bike secured with bungee cords. At this point, the two outside bolts on the fork mount were tightened to secure it in place.
The last piece of the puzzle was what to do with the front wheel? With the inboard pedal rotated back all the way against the load bar, the only way for it to move forward is to turn the rear wheel. But the rear wheel is fixed in place by the load bar going through the spokes. That means that the outboard/front pedal is a fixed stable platform. With that in the front, and the load bar stick out in the rear, the wheel can sit on those two points against the side of the bike. To hold it in place, the seat is rotated 90 degrees so that the nose points to the right, and then lowered over top of the wheel to hold it in place. This is easily done because of the quick rlease seat clamp, but could be done easily enough with a bolt on seat collar as well. Then, a second bungee cord is threaded through the whole mess to both hold the wheel on, and provide a back up to keep the bike on if the first bungee should fail. The entire thing is very, very solid. Much more secure than any of those stupid trunk mount bike racks that I have tried.
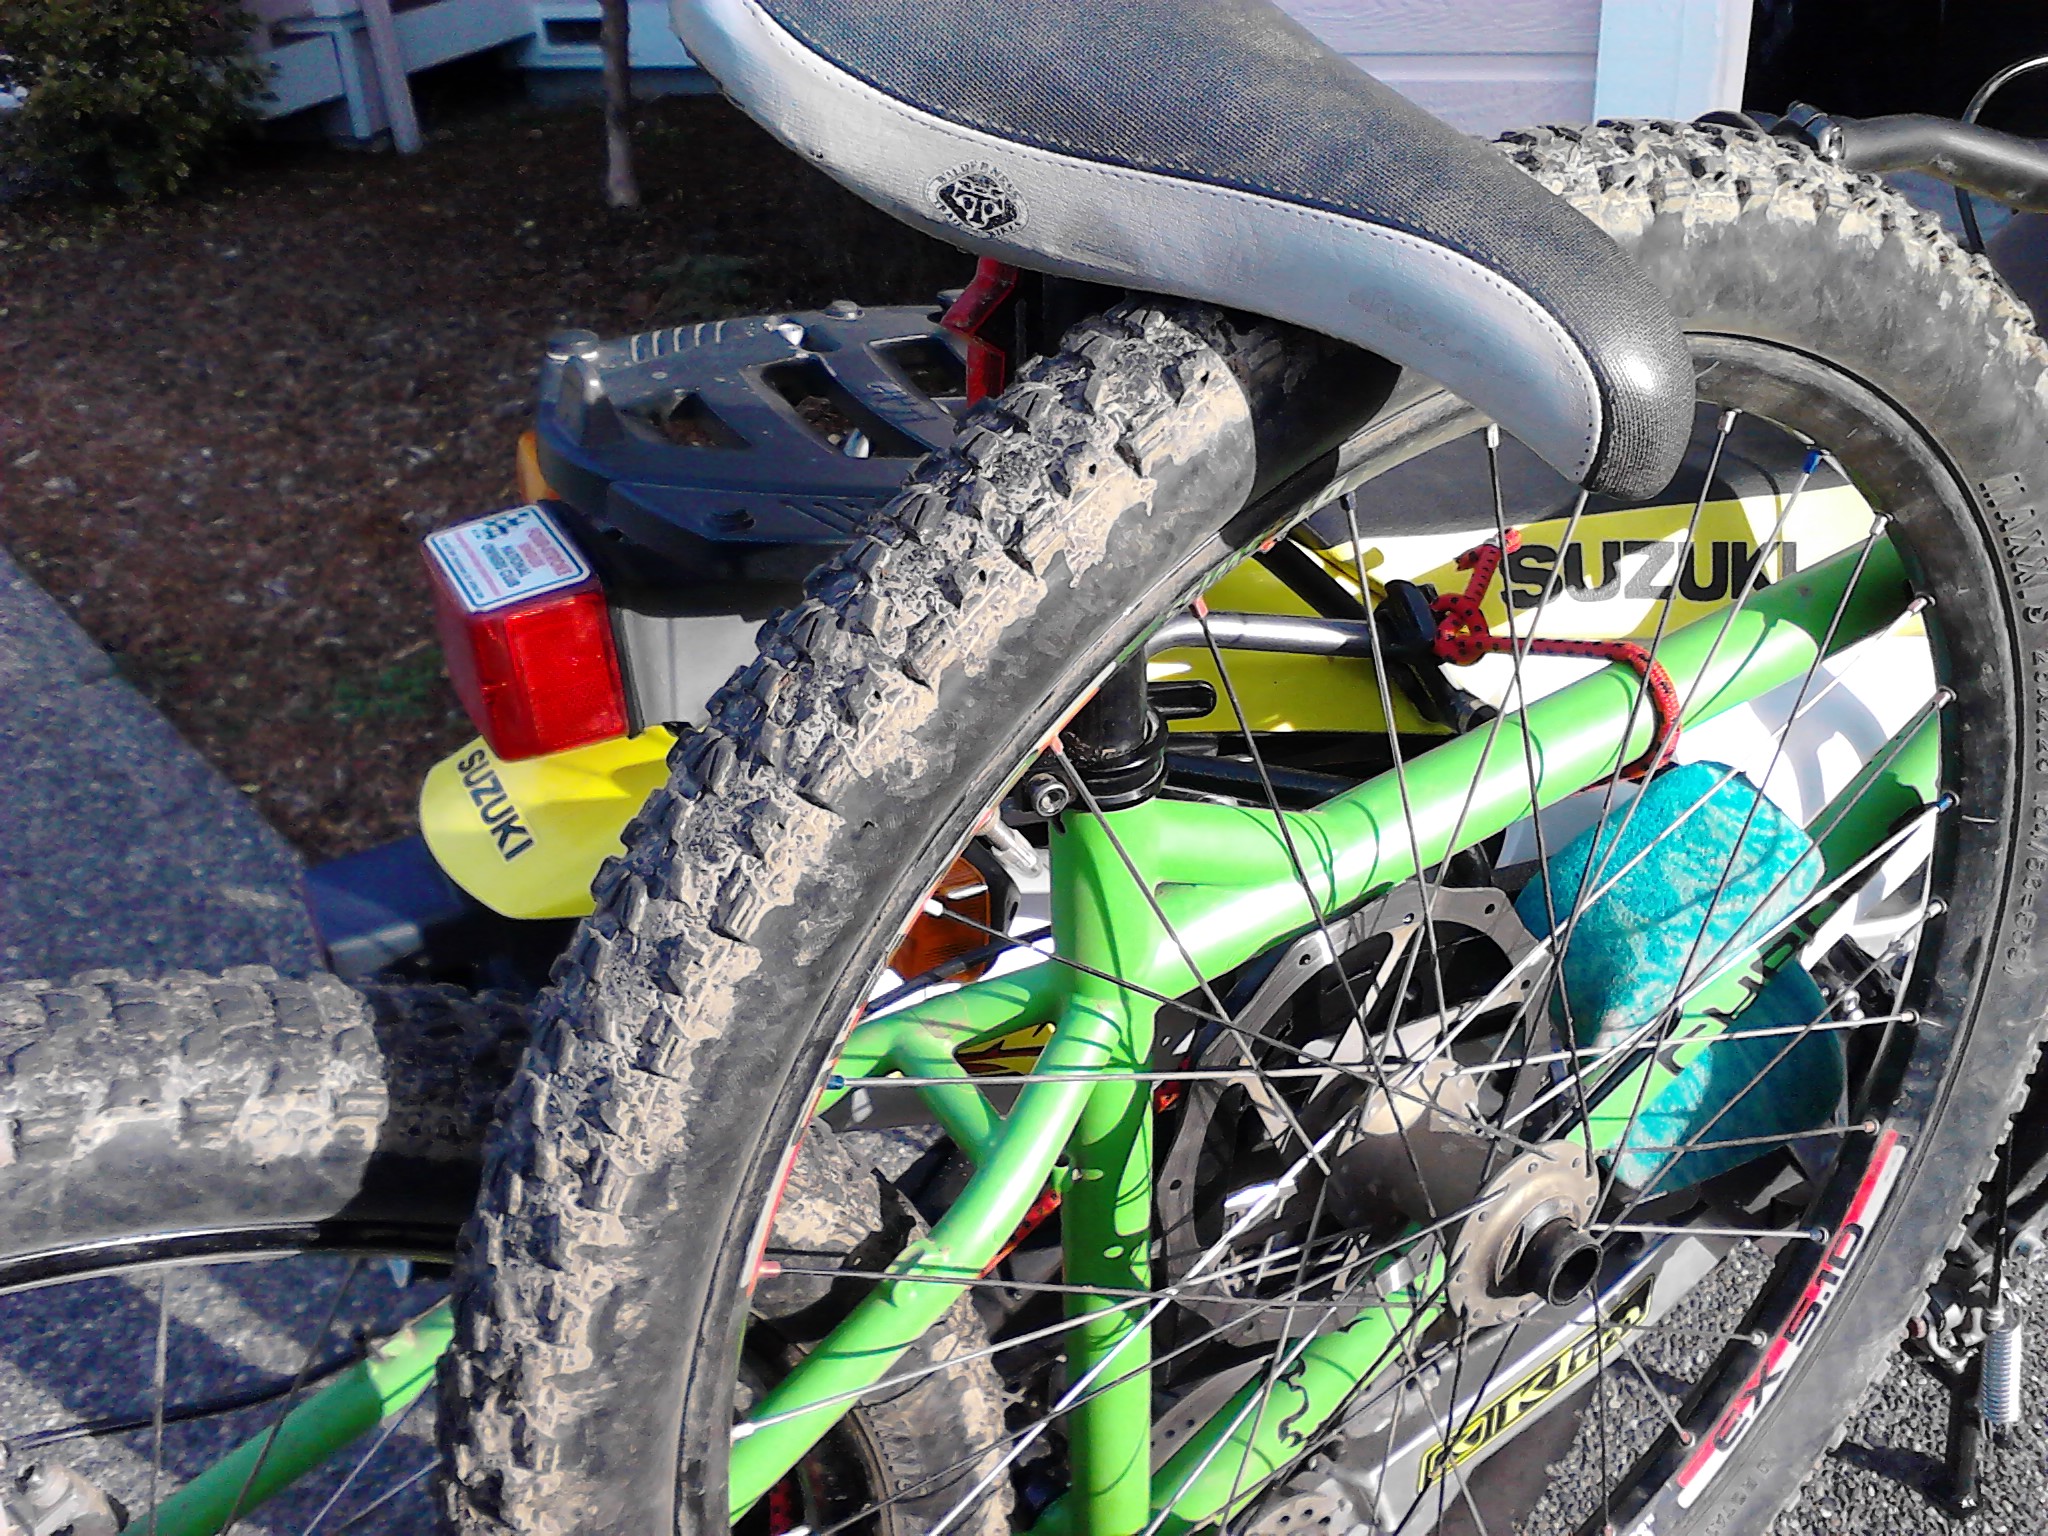
So that was it! Bike fully mounted. The Givi top box fit on ok, and a single Wolfman Enduro Waterproof soft pannier on the left, which I filled with a bag of charcoal just to give it some weight.
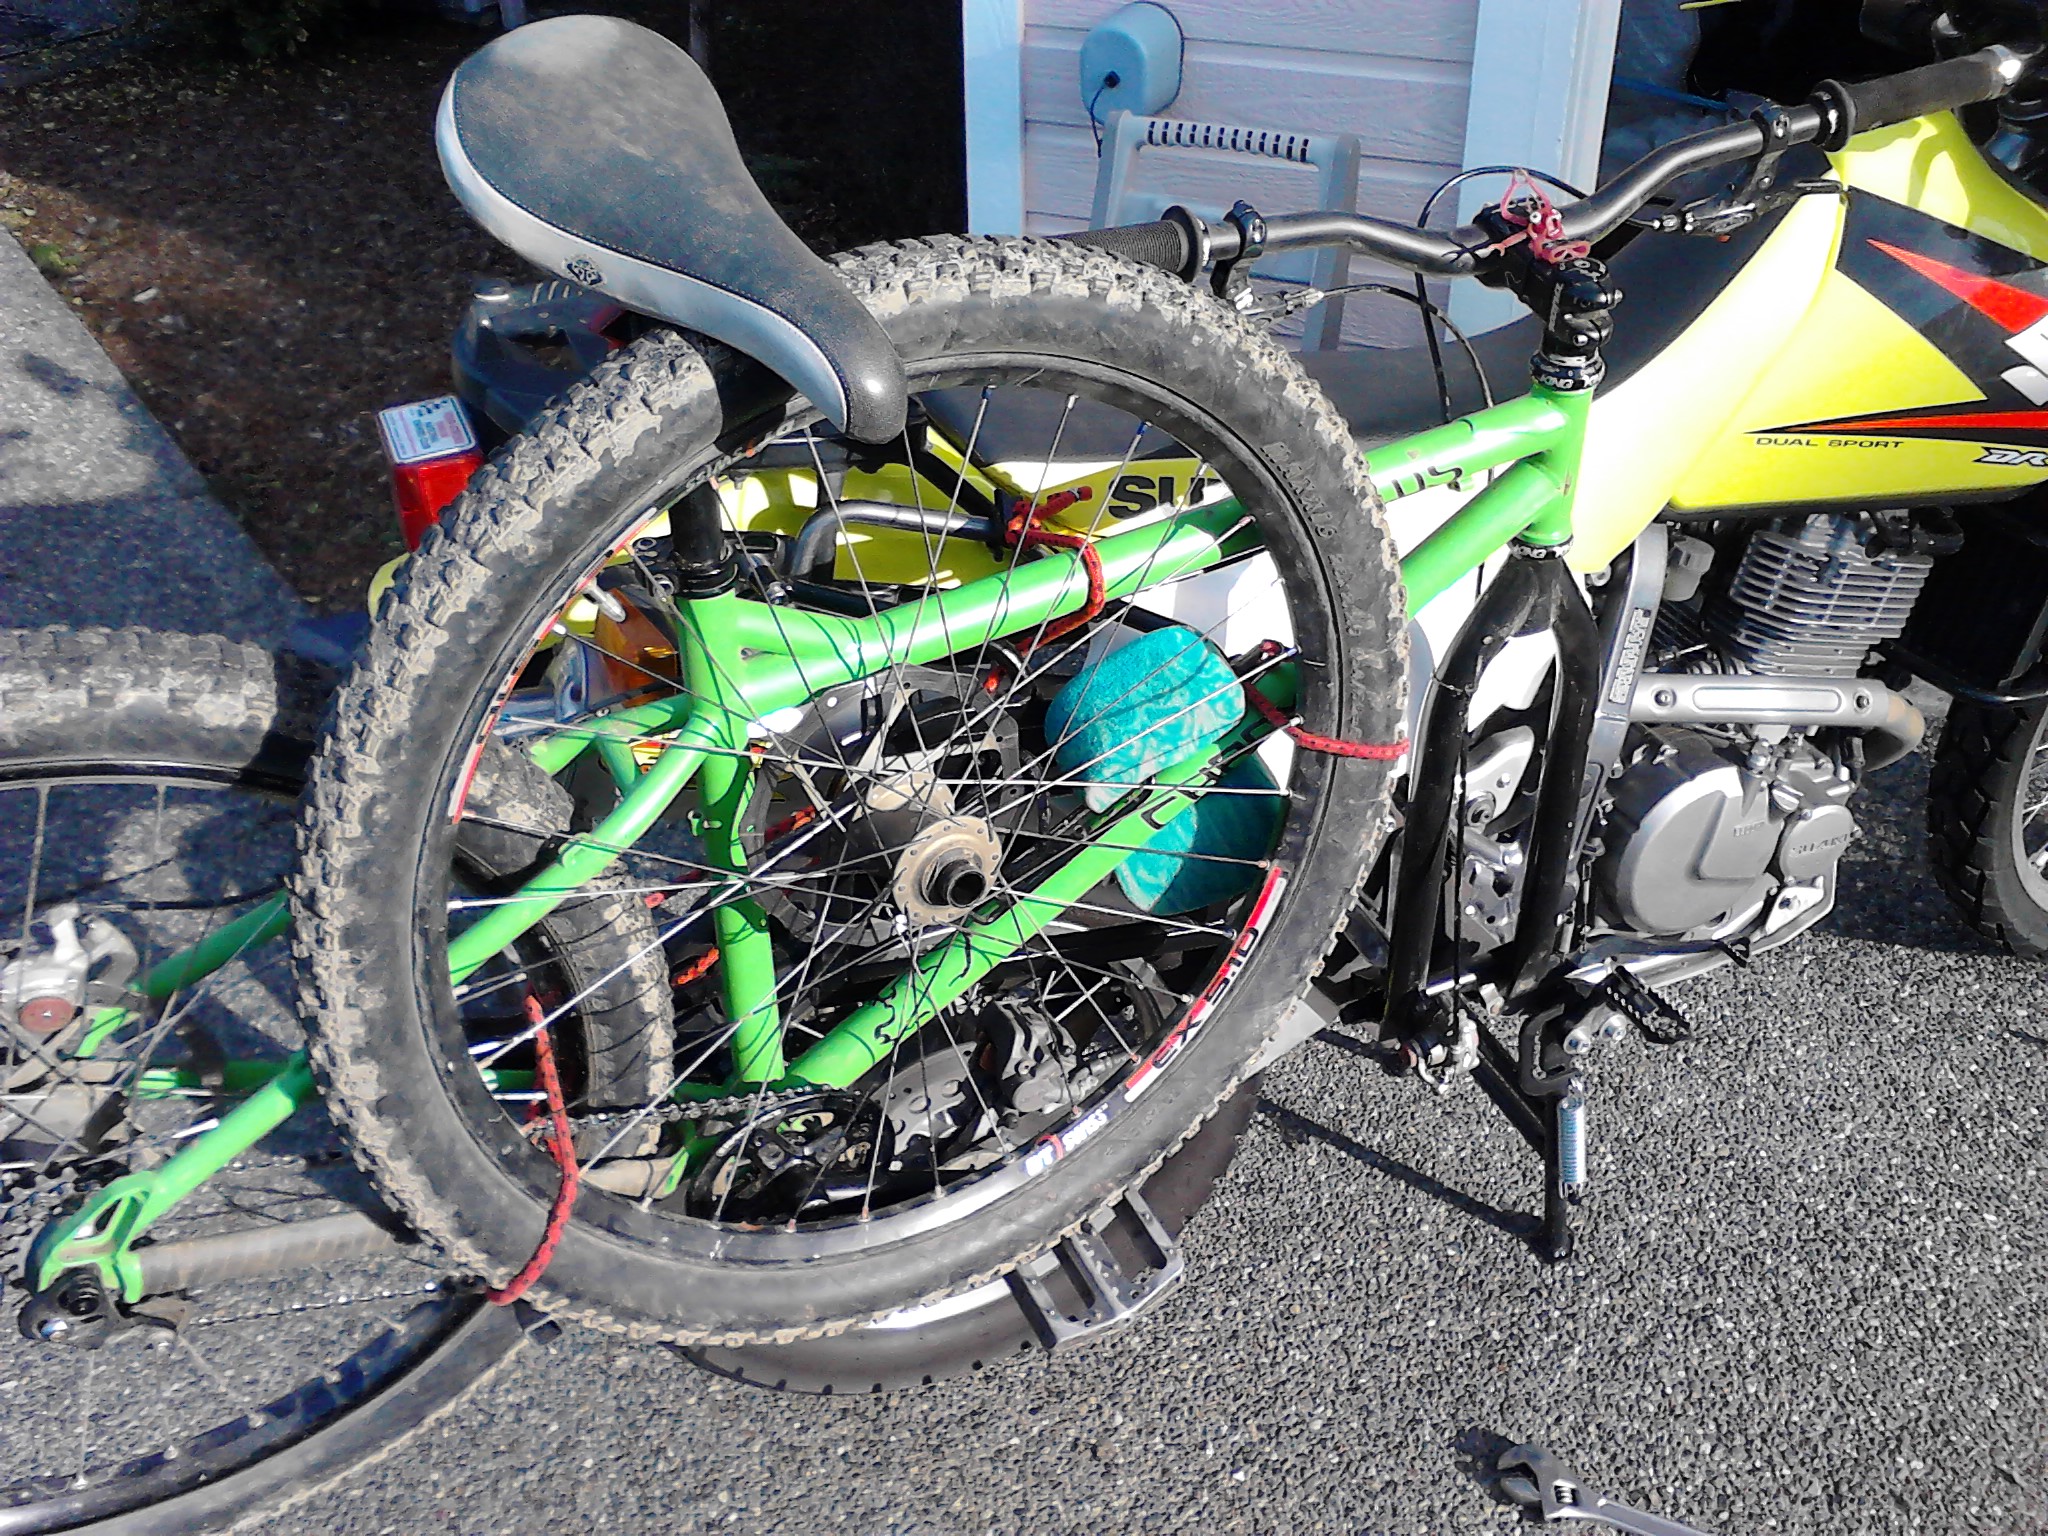
The next step was a test ride. First, I checked the clearance of my arm. For normal riding this was no issue. While on the road, the handlebars are turned from side to side very little, only a few degrees. The only time full steering lock is used is at very low speeds, such as in a parking lot or driveway or something, to make tight turns. For this, I had to angle my arm a little bit as the motorcycle bar passes under the mountain bike bar. It really wasn't too bad though, and again, this only comes into play when maneuvering the bike with feet down in very tight situations. If it ends up being an issue, I can loosen the stem pinch bolts and rotate the mountain bike bar to whatever location puts it out of the way.
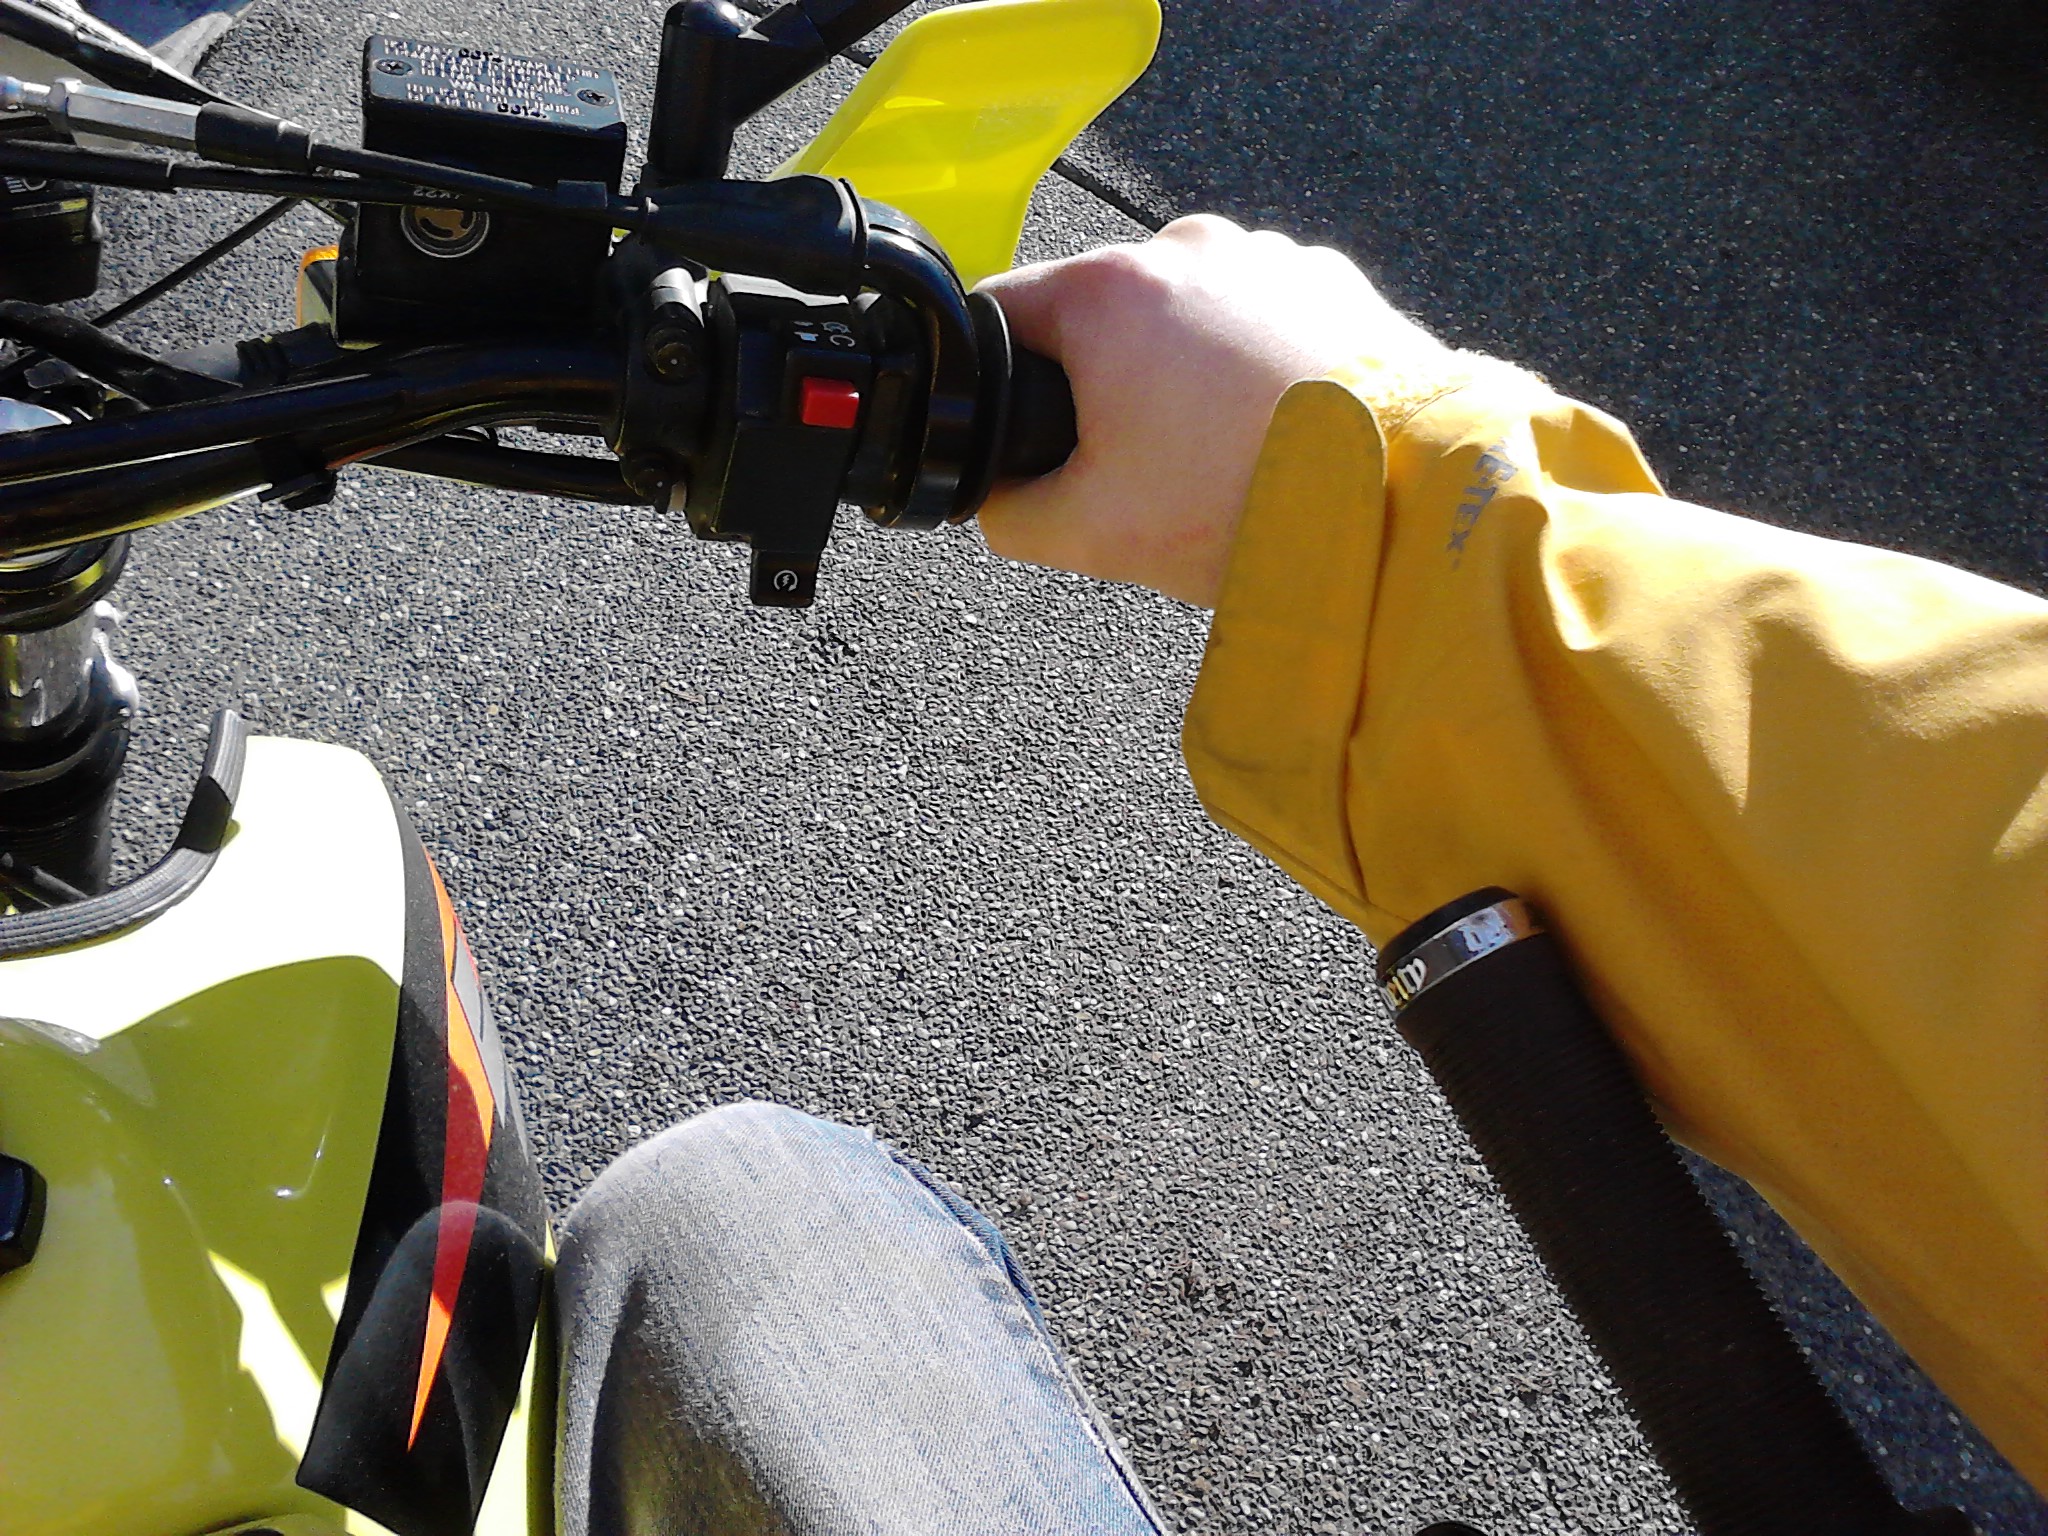
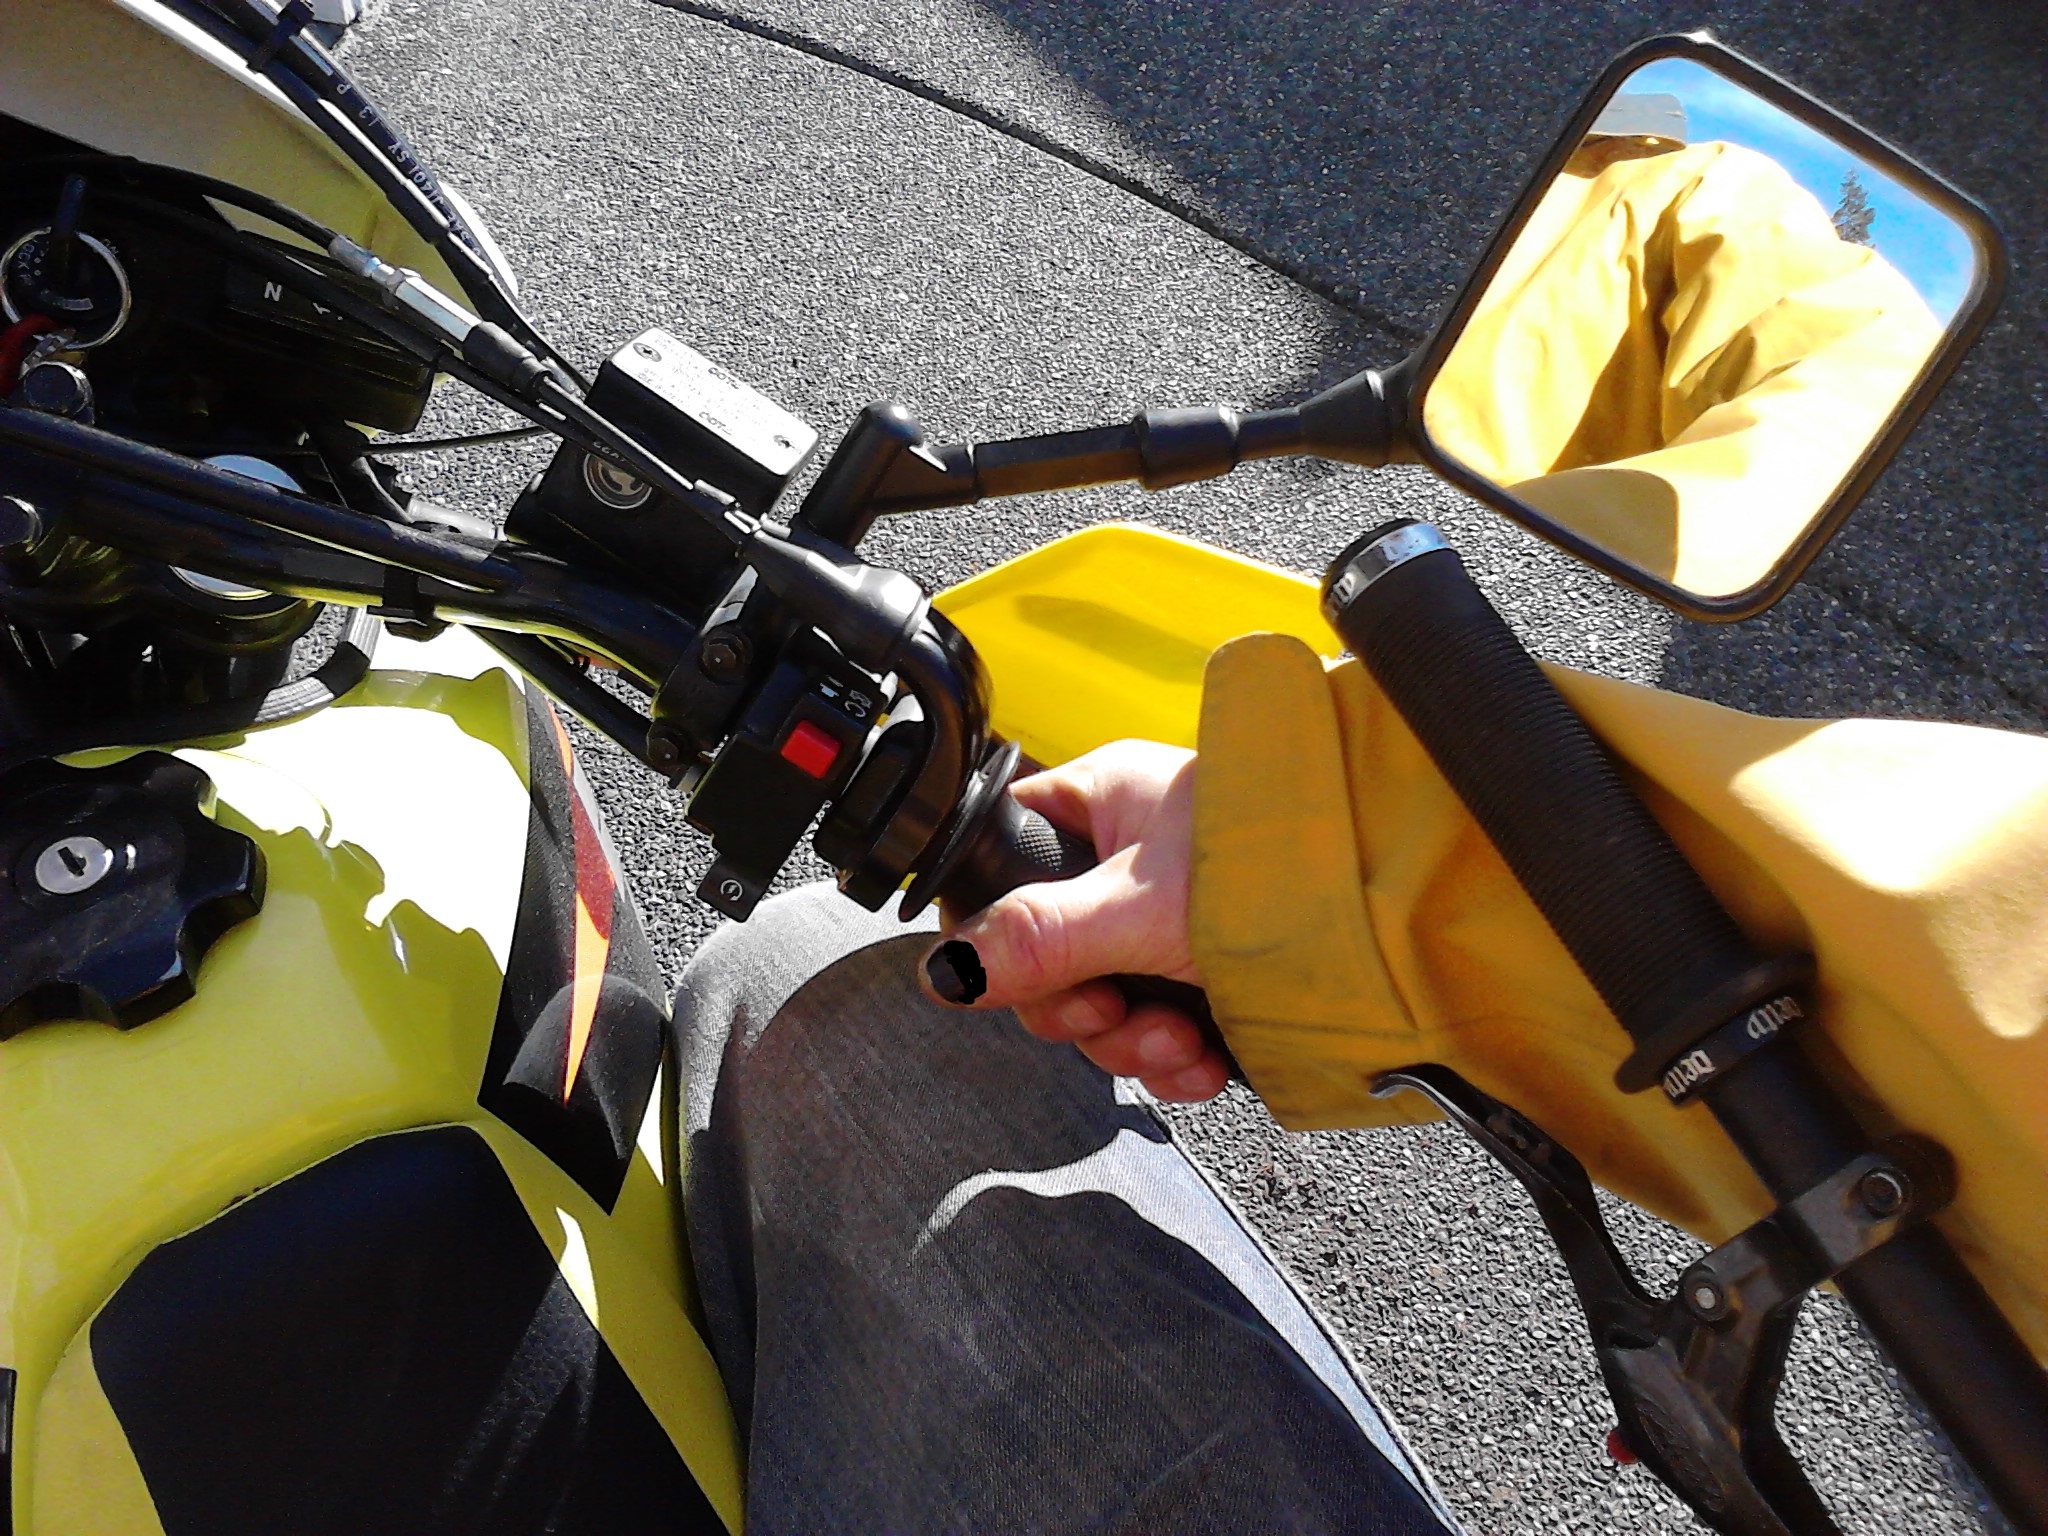
All suited up, I headed out. The bike did not move at all, and was really not noticable while riding. It limits your ability to move around on the motorcycle a little bit, or to slide your right foot back on the peg, but overall is pretty non-intrusive. The steering was a little awkward for parking lot tests, but a lot of that boiled down to me trying to keep a finger on the front brake while doing these maneuvers (habit). That cocks the wrist at an angle that puts it in the same space as the mountain bike bar. When I stopped doing that, it was fine. Again, let me reiterate, this is ONLY a factor when you are at walking speeds, with your feet down, trying to make a minimum radius turn in a parking lot or something similar. For any kind of normal riding, including 90 degree right hand corners from a stop, the bike was no issue whatsoever and had miles of clearance.
With the rack deemed a success, the last step was to clean things up a bit. The plate was removed, and the unneeded excess material on the corners was trimmed off with the same dull hacksaw blade. That was a LOT of work, and prompted me to finally stop at the hardware store and buy some new blades. Then the plate and both parts of the load bar were sprayed with a couple coats of black Rustoleum paint to keep them from rusting.

Although I have yet to use this to go for a mountain bike ride (I JUST finished it), I am pretty pleased with the outcome. It takes all of 20 seconds to remove or attach the load bar when it is needed or not needed, and the bike mounts up very securely. With the bike not attached, the rack is very onobtrusive, and you'd probably not even notice it unless you were looking for it. I will post more after a few times using it.